

Create a user
- Go to Settings → Users.
- Click New.
-
Complete the form:
- First name and Last name.
- Email. Address the user will use to access the platform.
- Role. Role that determines the permissions and the scope of information the user will have access to.
- Language. Language in which the console will be displayed for that user.
- Department. Department the user belongs to within the organization.
- Click New.
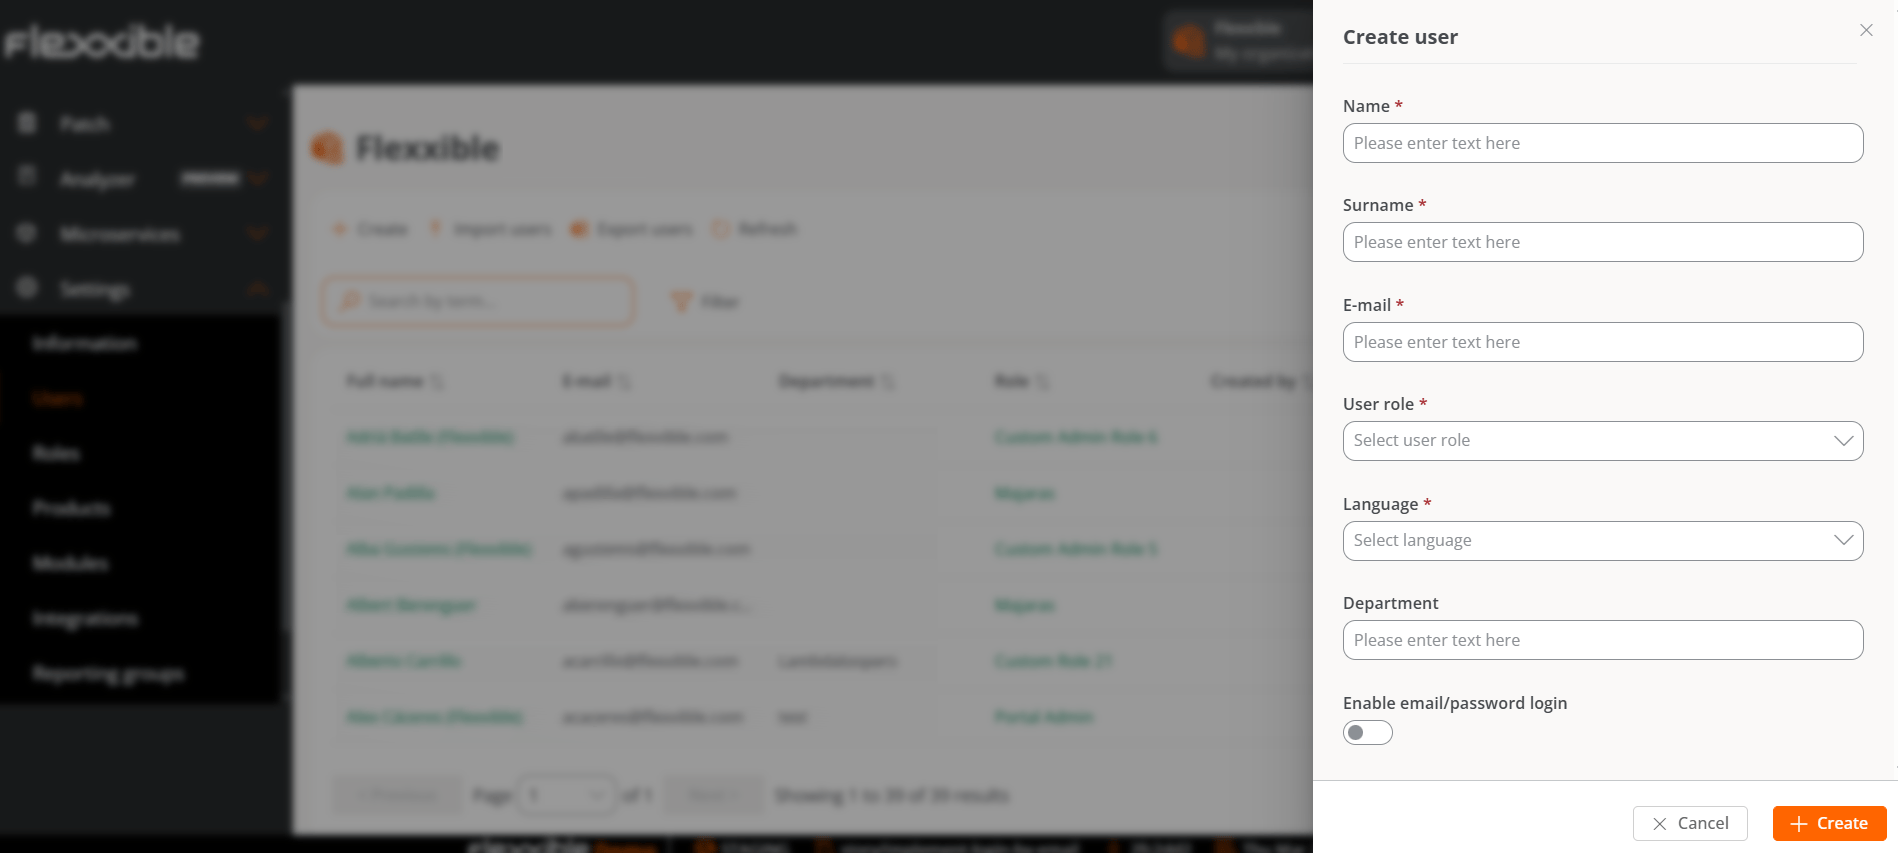
The assigned role can be changed later from the user’s detail view, without having to create the user again.
Create multiple users at once
- Go to Settings → Users.
- Click Export users to download the current list in an Excel file with the correct format.
- Fill in the file with the new users, keeping the existing columns.
- Click Import users and select the completed file.