

Supported versions and architectures
FlexxAgent is compatible with the following macOS versions and architectures:- macOS Monterey 12 and later
- Supported architectures: Intel (amd64) and Apple (arm64)
Limitations
There are certain functional limitations on macOS systems:- Features such as Flexxible Remote Assistance, end-user microservices, flows, or sending notifications are not available.
- Due to how macOS works natively, when the user locks the screen, the operating system suspends background processes. As a result, the device stops reporting information to the consoles and stops receiving actions until the screen is unlocked or the session is started again.
Download and installation
Installing FlexxAgent on macOS is done using an installation script and apkg file, the latter being needed to perform an offline installation (without automatic download of the installation package).
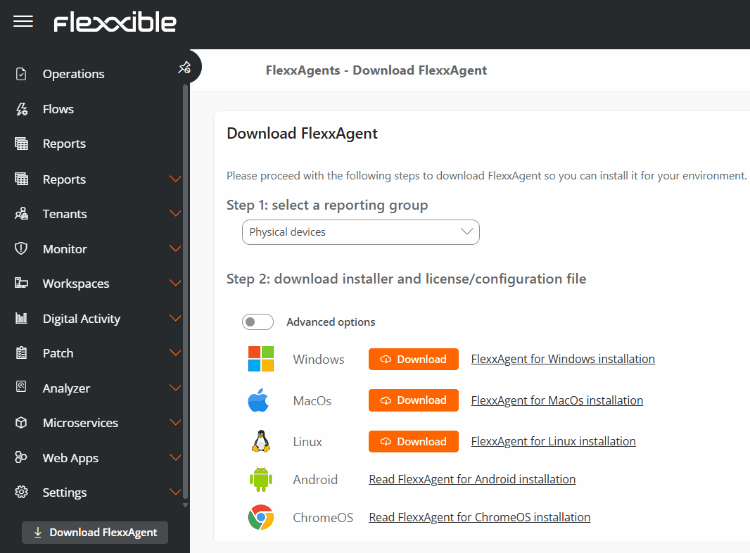
- Click the Download FlexxAgent button.
- Select a reporting group in the corresponding drop-down.
- Download the license/configuration file (
.conf) and the macOS installer.
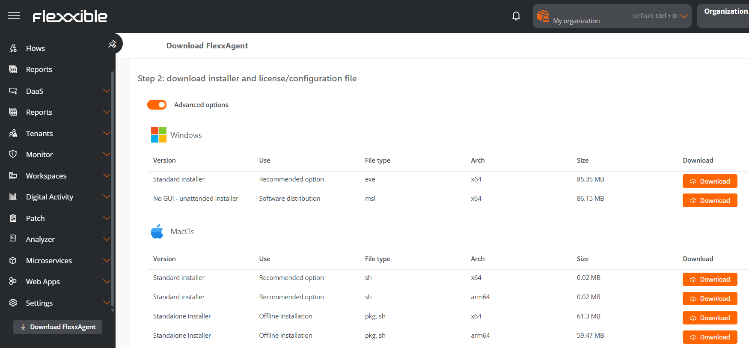
Available installer types
The advanced options let you select the installer type:.sh(recommended option): standard installation or offline installation..pkg: offline installation.
Installation script parameters
Examples
- Install FlexxAgent with the configuration file:
flexxagent-install.sh [-c|--config <path/file.conf>]
- Install a specific version of FlexxAgent:
flexxagent-install.sh [-v|--version <VERSION>]
- Access help:
flexxagent-install.sh -h|-?|--help
Offline installation
FlexxAgent can be installed in environments with network restrictions or without internet access. Installation steps:- Place the FlexxAgent installation package, the configuration file, and the installation script in the same folder.
- Allow the Terminal application to access the disk where the files are located:
- Go to System Settings → Security & Privacy → Privacy.
- Select Full Disk Access.
- Add the Terminal application to the list.
- Close Terminal if it was running and open it again.
- In the folder containing the FlexxAgent files, grant permissions to the script:
sudo chmod +x ./flexxagent-install.sh
- Run the script with the
-oor--offlineparameter:
sudo ./flexxagent-install.sh -c [configuration file] -o [Flexxagent package]
- Delete the used files if they are no longer needed.
Uninstallation
The uninstall script can be downloaded from the following URL:- Download the uninstaller from the URL.
- Grant permissions to the script.
sudo chmod +x ./flexxagent-uninstall.sh - Run the script.
sudo ./flexxagent-uninstall.sh
Uninstall script parameters
Examples
Uninstall and clean up configurations and logs:flexxagent-uninstall.sh [-c|--cleanup]
Access help:
sudo ./flexxagent-uninstall.sh --help
Proxy configuration
Proxy configuration must be done before installation, by modifying the downloaded configuration file. Unauthenticated proxyproxy = http://proxy_uri:port- Example:
proxy = http://192.168.0.100:443
proxy = http://user:password@proxy_uri:port- Example:
proxy = http://proxy_user:[email protected]:443