Portal
Portal is the central space of the platform, from where the available modules of the Flexxible products are accessed. It allows you to create, modify, or delete users, assign roles, and manage their permissions to perform and administer actions related to microservices, workflows, patch management policies, and more.
Through Portal, you can view license consumption data by environment, manage report groups, and activate features in FlexxAgent. It integrates with OAuth2, a framework that facilitates user authorization so they can easily log in using their corporate credentials.
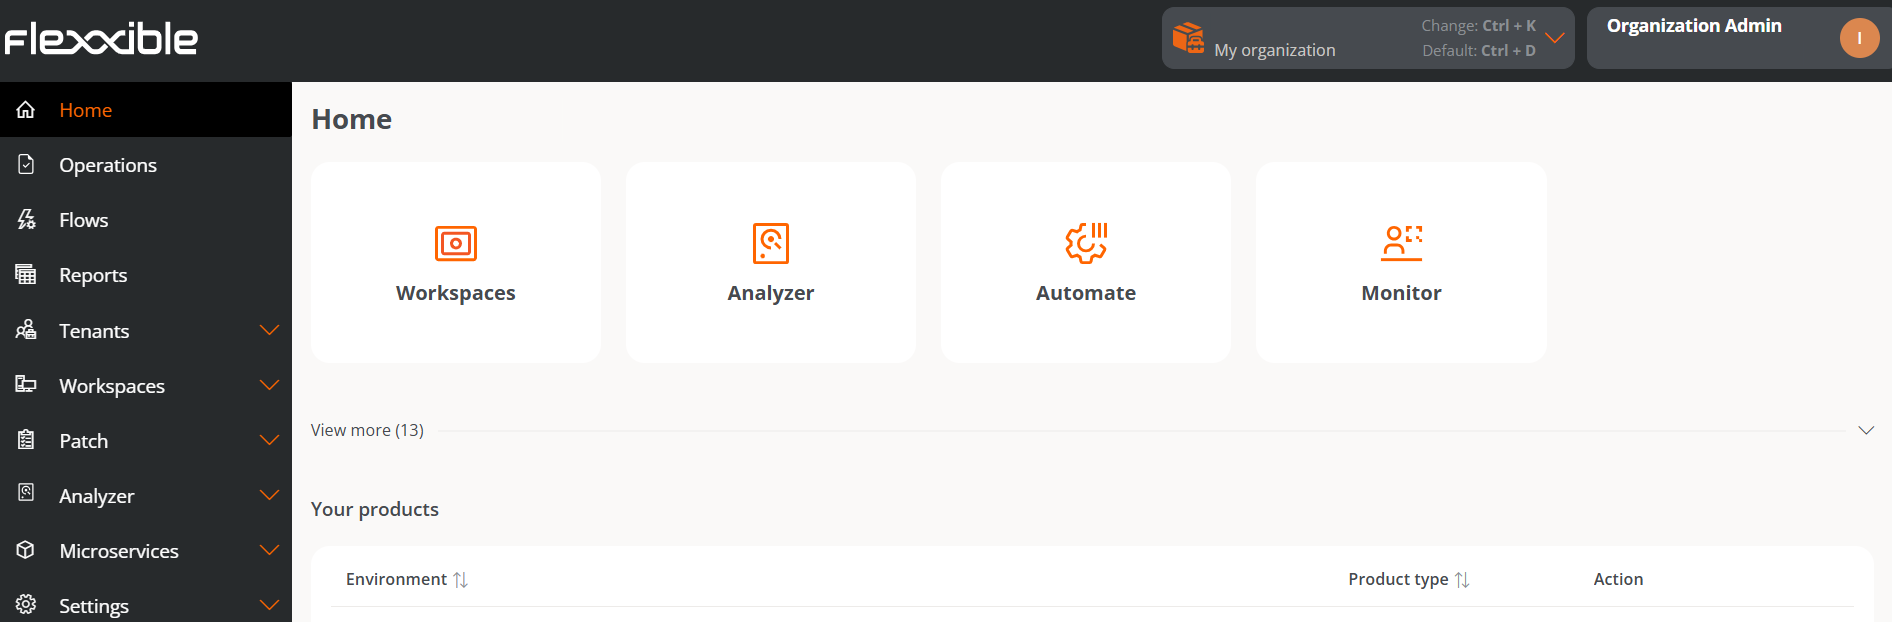
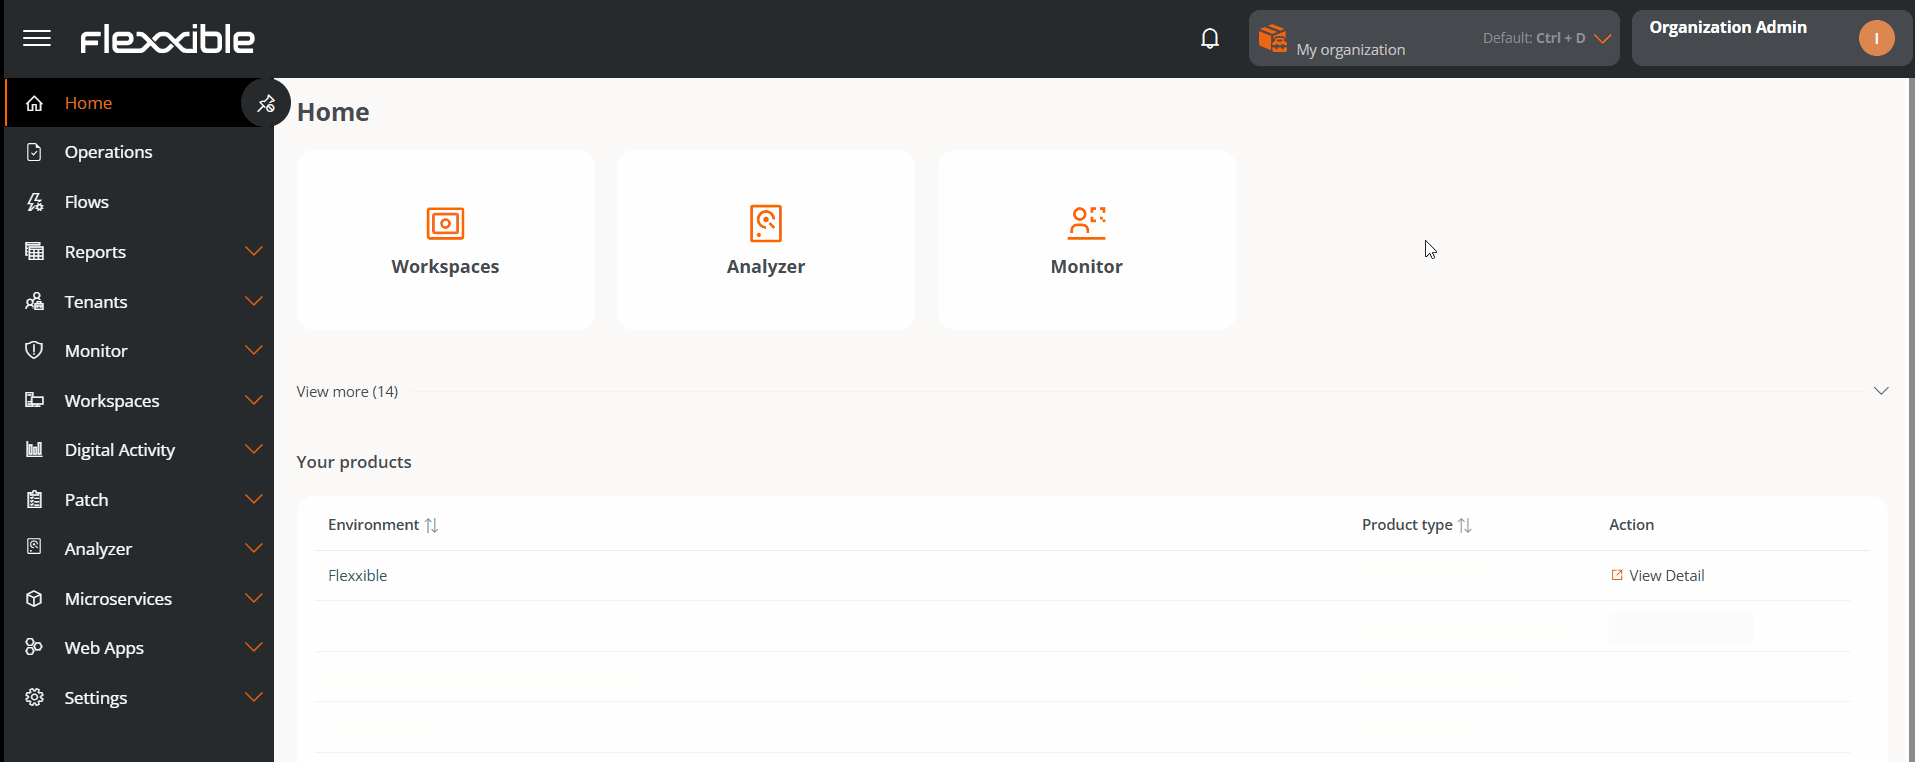
From the Home section, you can access the different modules that make up the solution and check the active licenses for the Flexxible products included in the subscription.
Sidebar menu
It consists of the following sections:
- Home
- Operations
- Flows
- Reports
- Tenants
- Monitor
- Workspaces
- Updates
- Analyzer
- Microservices
- Configuration
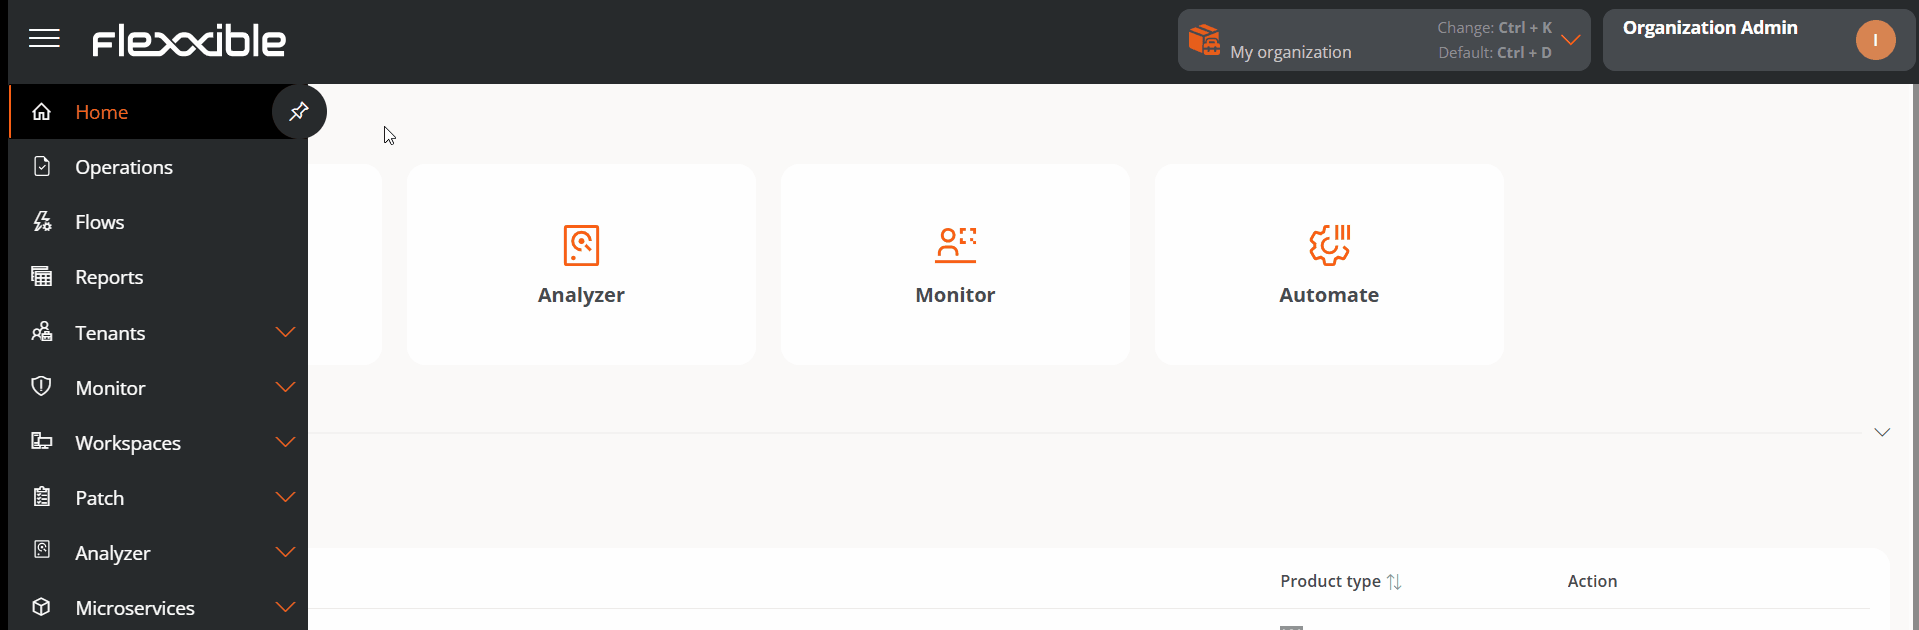
Menu collapse
The side menu of Portal can be collapsed to optimize screen usage and enrich the navigation experience within the platform. If the user does not wish to use this feature, there is an intuitive button available, shaped like a thumbtack, that pins the menu and prevents collapse.
Organization selector
At the top, to the right of the interface, is the organization selector. If a user has access to multiple organizations, as in the case of Managed Services Providers (MSP), they can select the one they want to manage very easily: just expand the list of organizations and choose or type in the search box a string of text that matches the name of the organization they want to find, select it, and press the Enter key.
You can also select an organization using the search bar, by pressing Ctrl + K or Cmd + K (on Mac).
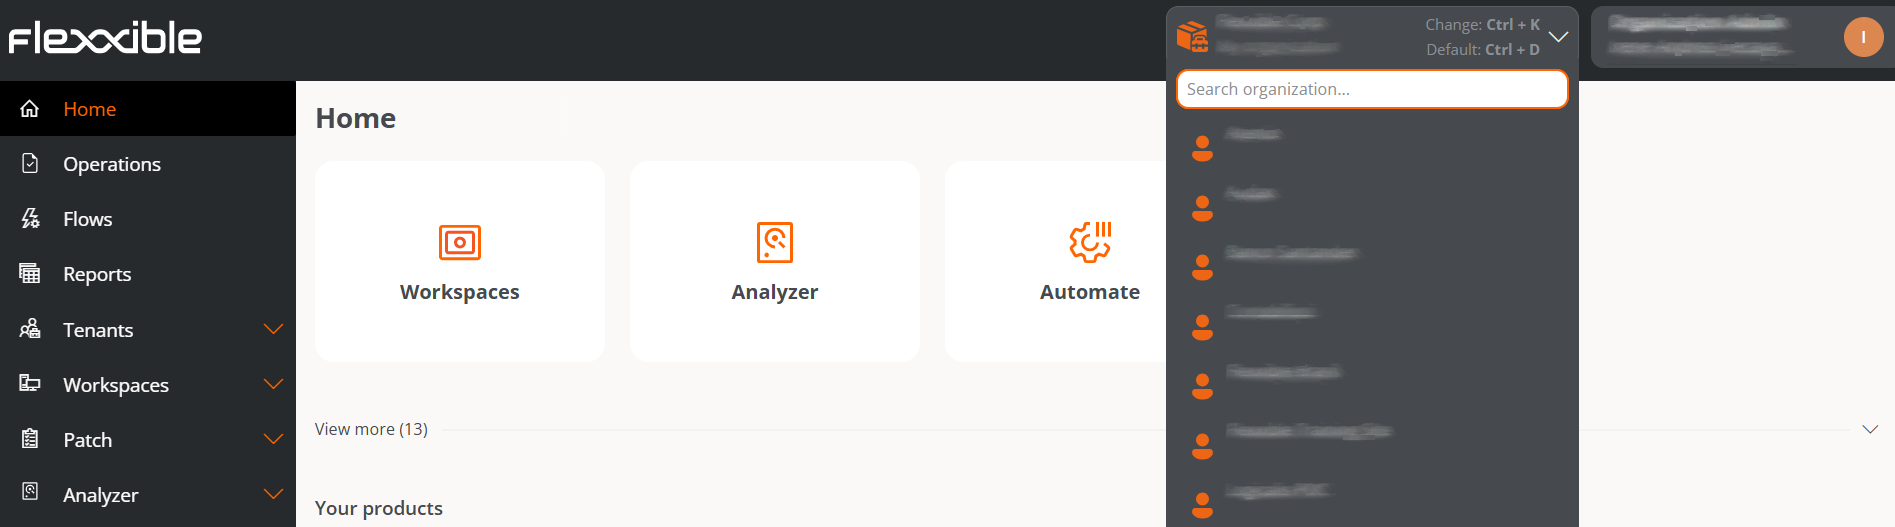
To return to the default organization, you can repeat the same procedure or use the shortcut Ctrl + D or Cmd + D (on Mac).
User Settings
In the user menu, on the right side of the interface, the name and role assigned in Portal are displayed. By clicking, the following options are displayed:
- Operations log
- My logins
- Settings
- Log off
Operations List
The table contains the list of operations executed on the user's organization devices and the devices of organizations they have access to, such as managed service providers (MSP).
The fields provide information about the organization to which the device belongs from which the operation was executed, the operation process ID, its status, the name assigned to the process, if there was an error, what the operation consists of, the date and time it was started and updated.
My logins
It provides information about the user's session connections, including IP address, name of the Flexxible application accessed, user agent, and date and time of access. The data comes directly from the authentication provider. You can view up to the last 30 days or the last 1000 login sessions at most.
Settings
The left section, User Settings shows the general user data. On the right, in Preferences you can manage the account preferences, and at the bottom, Authentication Security Settings allows you to manage the security levels for email and password authentication at the user level.
Preferences
- Default Organization. The default organization is the one the user will see by default when entering the Portal. This option allows selecting it from the available organizations shown in the dropdown list.
- Language. The language in which the interface will be displayed: Spanish, Portuguese, English, Catalan, or Basque.
- Select Regional Settings. The chosen option will determine the platform interface settings.
- Advanced Menu. Allows you to expand the Portal's side menu, adding shortcuts to specific functionalities of the other modules.
Authentication security settings
From this section, you can manage the security levels for user authentication by email and password. For more information, please refer to the Access and authentication documentation.
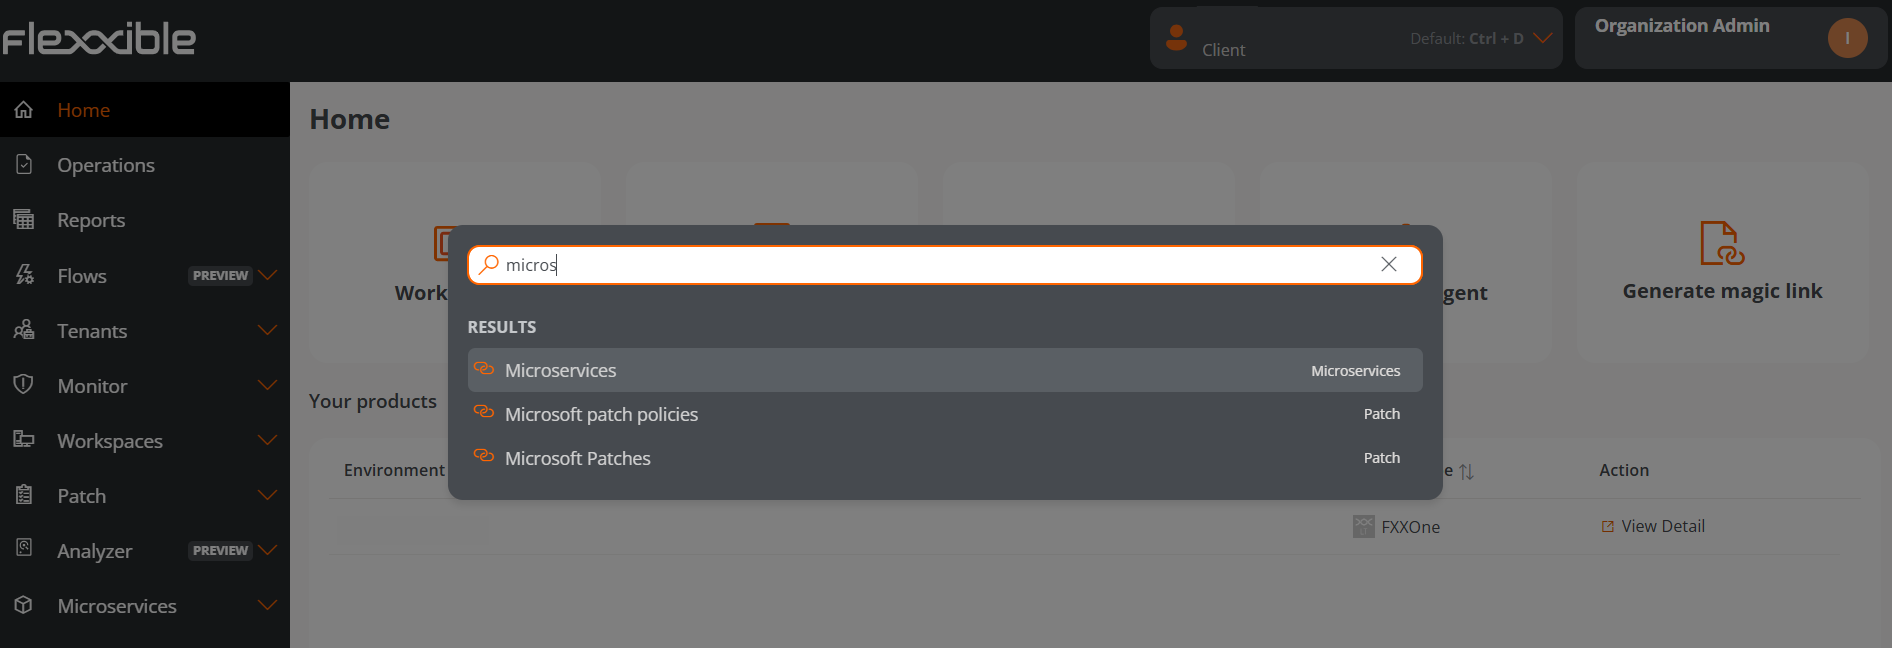
Search bar
The search bar is a central tool that allows quick access to information and functionalities within Portal without the need to navigate manually through the menu.
It can be opened at any time using keyboard shortcuts:
- Ctrl + K (Windows)
- Cmd + K (Mac)
Functionality
The search bar allows:
-
Direct access to sections and subsections of Portal
Just type the name (or part of the name) of the desired section, for example, Microservices, to navigate immediately.
-
Change organization
By entering the name (or a partial string) of the organization, it will appear in the results so you can select it and change the management context.
-
Make requests to Create with AI - Reports
Allows you to enter natural language requests to generate reports using artificial intelligence.
-
Search Devices
Allows you to locate devices by the device name or associated user.
Next to the device name, in parentheses, the name of the last user who used it will be displayed.
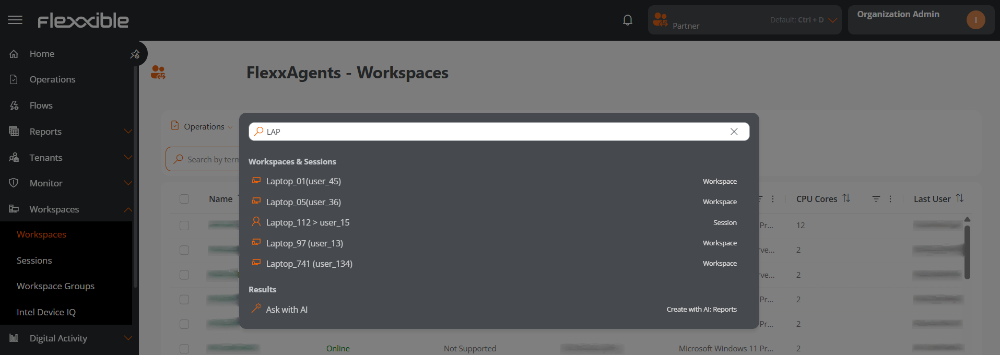
-
Search Sessions
Allows you to locate sessions by the user's name or associated device.
Considerations about the search bar
- Search must be conducted in the same language configured in Portal.
- The search history is specific by organization and updates when changing context.
- It shows suggestions and recent searches to speed up frequent access to resources.
Tables
Tables are a fundamental part of Portal because they are used to display data in all sections of the application. They are generally structured as follows:
Top bar
It is composed of the following buttons:
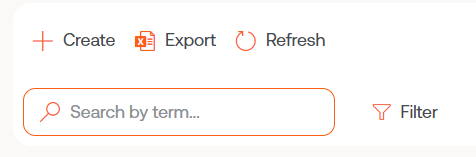
New
Opens a form to enter data. The fields depend on the section of the Portal being viewed. For example, if the user is in the Tenant section, the form will request information for the new tenant.
Export
When you click Export, an Excel file with the table data will be downloaded.
Reload the table
It is an enhancement option, very useful when you want to update the list, especially when new data has been created.
Search by term
Allows more precise searches. You must enter characters that correspond to the data you are searching for.
Filter
It is a more complete alternative for making searches. Displays a menu to choose the table field where the search will be conducted; once selected, the Value option is enabled to enter a term by which you want to filter. You can create as many filters as there are field options displayed.
Full screen
![]()
Considering that tables are an essential part of Portal, the full screen button expands the table size to improve data visibility and user experience.
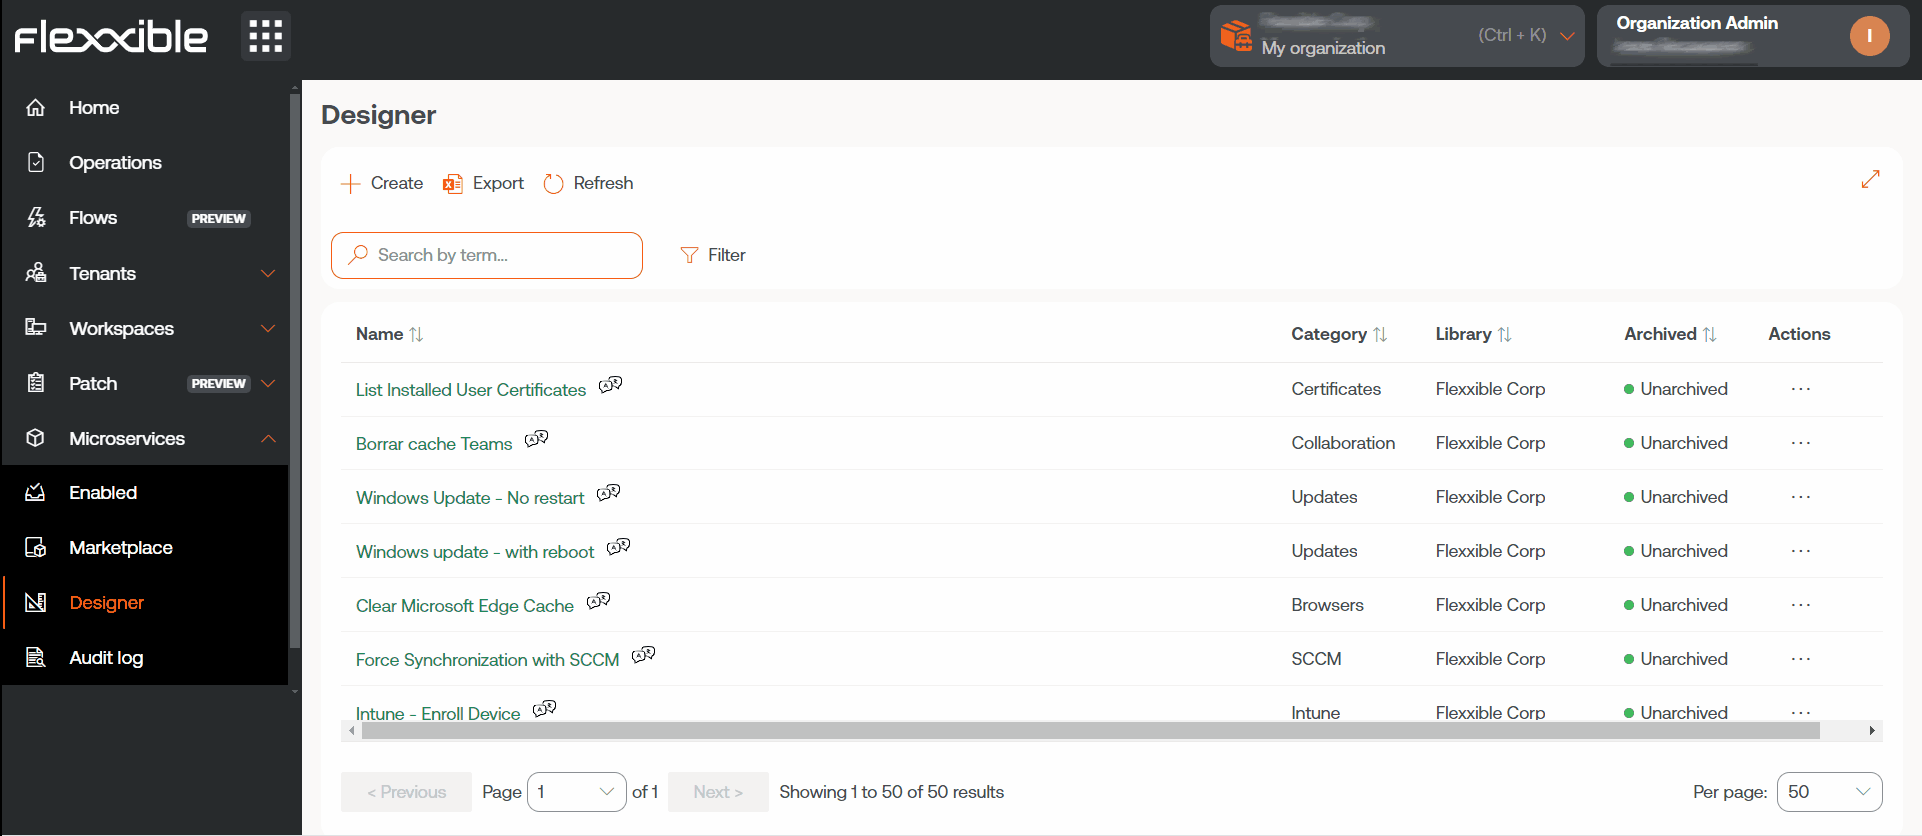
Content
Table columns order the information according to fields. Its content can be sorted in ascending or descending order, according to the alphabet. And the width of these can be adjusted by placing the cursor between two field names.
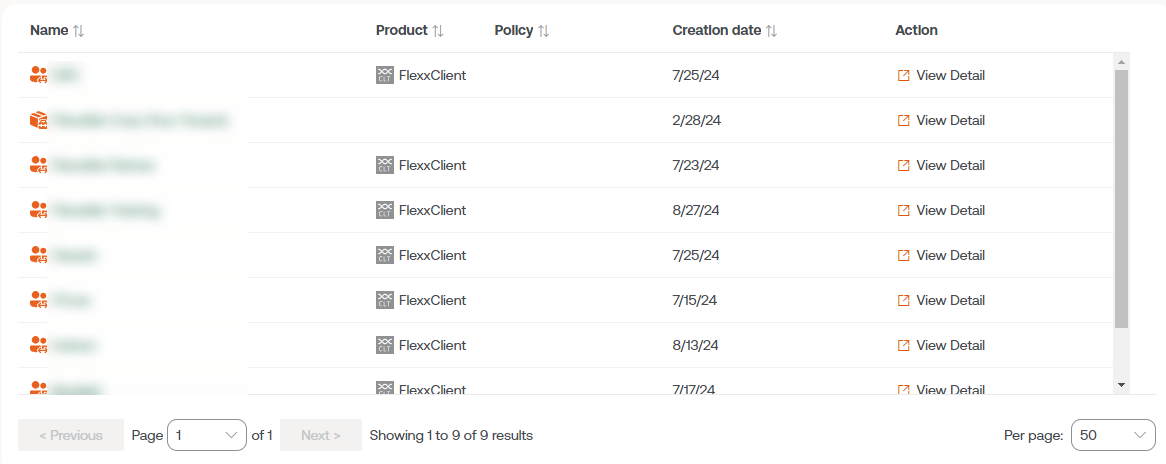
Bottom bar
All tables have a navigation bar at the bottom that allows you to select how many results will be displayed per page and the page number you want to go to.
