

- Authentication with a Microsoft Entra ID or Google account
- Authentication with email and password
- Authentication with SAML
Authentication with a Microsoft Entra ID or Google account
For the Flexxible single sign-on (SSO) system to validate Microsoft or Google accounts and authorize access to the platform, an administrator must grant the following permissions:- Microsoft Entra ID. Enable the use of a Flexxible Enterprise Application in their tenant.
- Google. Enable the use of a Flexxible OAuth Client ID in their tenant.
Enterprise Application consent and permissions in Entra ID
Access can be granted to individual users or to groups. However, as explained above, there is an option to simplify the process: have an administrator grant organizational consent for the use of the Enterprise Application. This consent will automatically register the Enterprise Application in the Azure tenant and will allow the organization’s users to sign in to Flexxible with their corporate credentials. All the administrator needs to do is try to sign in to the Flexxible platform for the first time in order to trigger the consent request.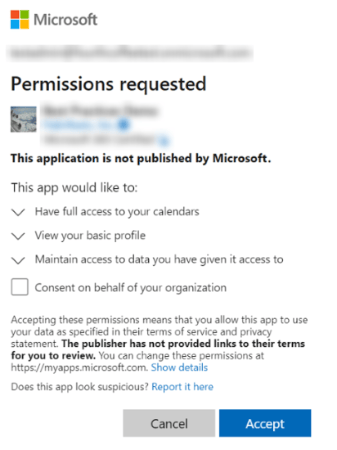
Authentication with email and password
By default, all Flexxible platform users have the option to sign in with a Microsoft Entra ID or Google account enabled. Optionally, users with the Organization Administrator permission can enable sign-in via email and password for other members of the organization. Users will then be able to choose how they want to sign in.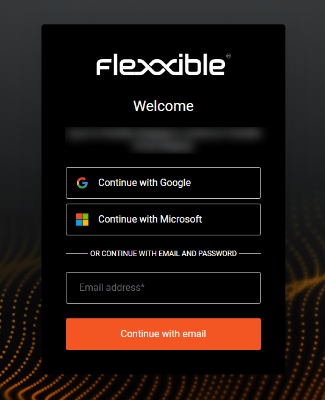
Sign-in process
To sign in to the Flexxible platform using email and password for the first time, follow these steps:- Enable access to email and password authentication for the user. This step must be performed by an Organization Administrator.
- Once enabled, the user will receive a welcome email with a link to create their password. The link is single-use. If they cannot sign in with it, they can always authenticate with Microsoft Entra ID or Google.
- Create a password; without one, they will not be able to sign in.
- Set up two-factor authentication through an authentication application. The first time the user tries to sign in with email and password, the platform will ask them to do so.
- Sign in.
Access to email and password authentication
To enable this method for users, an Organization Administrator must have first enabled the email and password authentication option at the organization level. An Organization Administrator can then enable access for the users that make up the organization. To do this, Flexxible offers the following options:- Enable access for a new user
- Enable access for a batch of users
- Enable access from the user table
Enable access for a new user
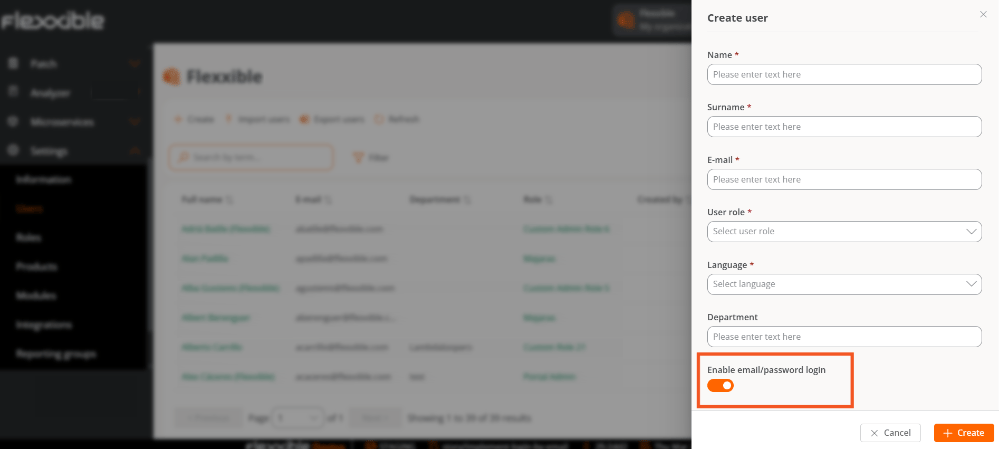
- Go to Settings → Users.
- Click New. A form will open requesting the user’s information.
- Check the Enable email/password sign-in option.
- In the form, click New.
Enable access for a batch of users
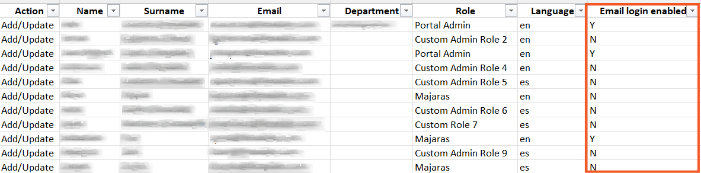
To perform this action, we first recommend exporting the user list to get the Excel file with the correct format:- Go to Settings → Users → Export users.
-
Open the Excel file. In the Email login enabled column, indicate which users will be granted access: Y (enables) and N (disables).
- Save the new file and return to the user list table: Settings → Users.
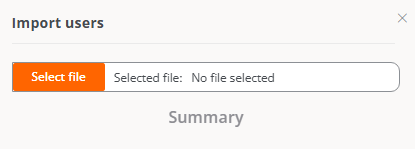
- Click Import users. Select the saved file.
-
Click Import.
Enable access from the user table
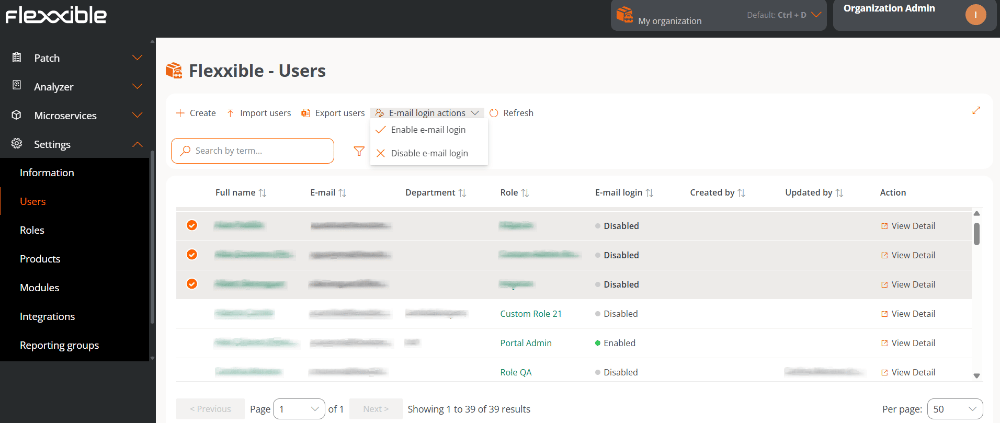
- Go to Settings → Users.
- Select the users you want to enable access for.
-
In the top menu, click Email sign-in actions → Enable email sign-in or Disable email sign-in, as appropriate.
Reset password from the user table
- Go to Settings → Users.
- Select the users to whom an email with the link to generate a new password will be sent.
-
Select Email sign-in actions
→Resend password reset email.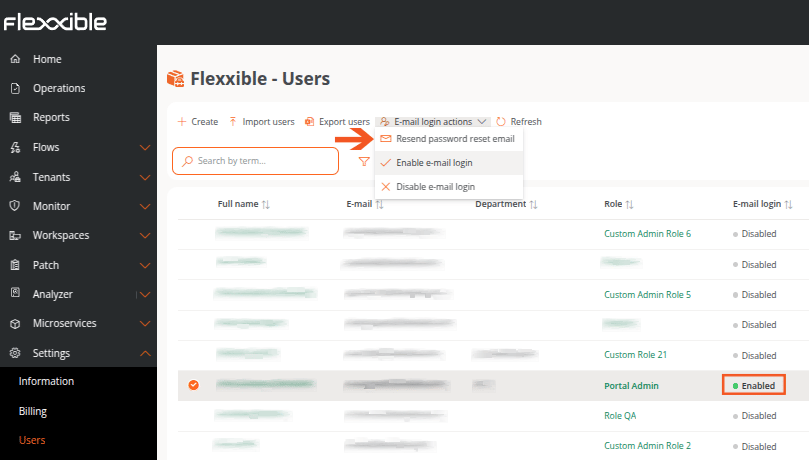
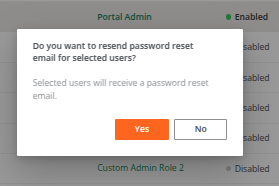
This option is only available for users who have email and password authentication enabled.
Authentication security settings
Flexxible lets you manage the security levels for email and password authentication, both at the user level and at the organization level.Authentication security settings at the user level
From User profile → Settings → Authentication security settings, users can set up three two-factor authentication methods and configure their password.Two-factor authentication
This security measure is available for users who sign in via email and password, adding an extra layer of protection to the account. Authentication methods For two-factor authentication, the platform allows three methods to be enabled:- Authentication application
- Recovery code
- Email verification
Authentication application
An authentication application generates single-use verification codes. When this authentication method is enabled, when signing in to the platform, the user will be asked to enter that verification code along with their usual password. To do so, they must first download an authentication app, such as Microsoft Authenticator, Google Authenticator, or any other they prefer. To add this method, the user must click Enable in the authentication security settings panel. A modal window will show a QR code. Once scanned, the user must enter, in the reserved field, the six-digit verification code provided by the authentication application. A recovery code will then be shown, which the user must save to use if they ever need to sign in and do not have access to the device where the authentication app is installed. From then on, when signing in, the user will be prompted for the verification code in addition to their password. When a user signs in to the platform for the first time using their email and password, they will be asked to set up this authentication method to raise the security level of their account.Verification code and Recovery code are not the same. The first is generated by the authentication application, and the second is provided by Flexxible as a precaution.
Recovery code
When the use of the authentication app is enabled, Flexxible generates a recovery code for the user to save and use when they do not have access to the device where the authentication app is installed. The Recovery code option lets you regenerate that code if it has been lost, to verify the user’s identity when they want to sign in.Email verification
If enabled, this allows the user’s identity to be verified by email if they forget their password or do not have the other methods to identify themselves. To enable this option, the user must click Enable in the authentication security settings panel. From there, the user can also see the date and time when the method was last used, as well as the last time it was added as a two-factor security method. Reset two-factor authentication Lets you reset the two-factor authentication methods when a user loses access to the devices that let them identify themselves. When you click Regenerate, the two-factor authentication methods are disabled. The user can enable them directly from the same security settings panel, or by signing out and signing back into the platform. It also reports the date and time when two-factor authentication was last reset.Password
From the same panel, the user can request their password to be reset. They must press the Resend password reset email button to receive an email with instructions. It also reports the last time the password was changed, the last sign-in, and the last IP address from which they connected.Authentication security settings at the organization level
An Organization Administrator can enable or disable the option to sign in via email and password for users in the organization and its suborganizations. The feature can only be enabled or disabled from the main organization if there are suborganizations. To do so, go to Settings → Organization. In the left-hand side menu, click the Authentication tab.Enable or disable the email and password authentication option at the organization level
The Enable email/password authentication or Disable email/password authentication button, as appropriate, lets you enable or disable the ability to activate email and password sign-in for users who are members of an organization or suborganization.User table
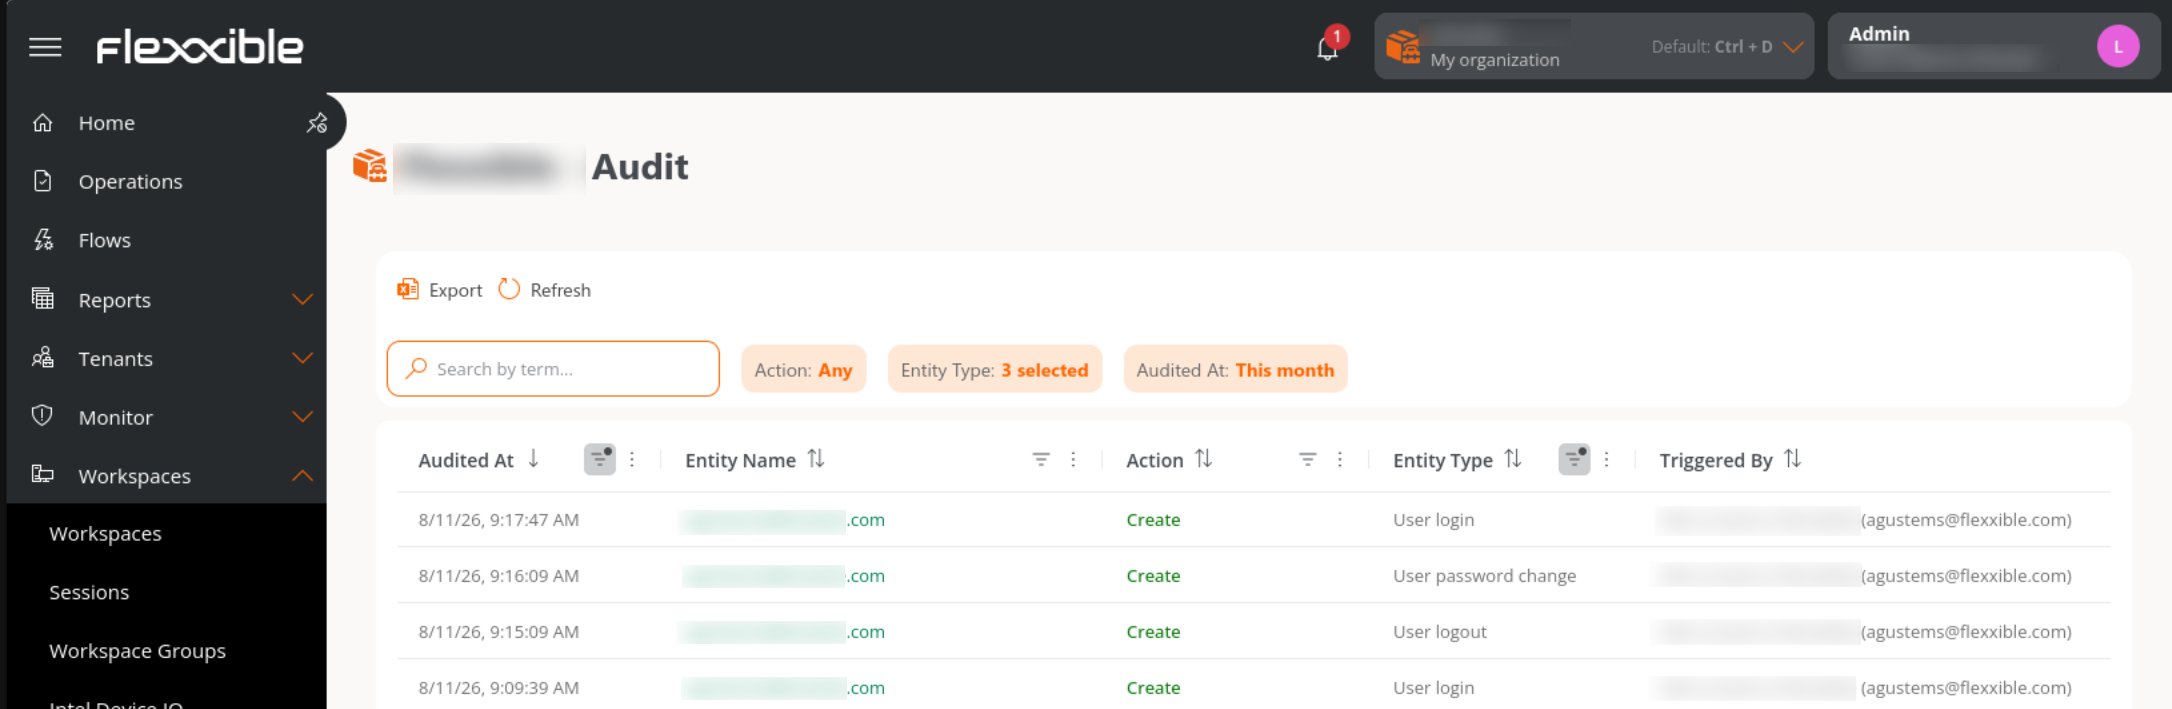
The user table on the Authentication tab shows the list of members of the organization. At a glance, from here you can see which members have the option to sign in via email and password enabled.User authentication detail
If you click a user’s name in the table, you can access cards with specific information about the authentication method that is enabled:- Microsoft Entra ID. Job title, Phone, Last sign-in, Sign-in count, and Last IP address
- Google. Last sign-in, Sign-in count, and Last IP address
- Email and password authentication. Last sign-in, Sign-in count, and Last IP address. In addition, from here the administrator can manage the Authentication security settings for that specific user, which include Two-factor authentication and Password.
Authentication with SAML
Security Assertion Markup Language (SAML) is a single sign-on (SSO) technology that lets organizations connect their identity providers (Okta, Entra ID, and others) with the Flexxible platform, delegating the authentication process to it. To set up sign-in with this method, adjustments must be made related to recognizing the organization’s domain and integrating with the identity provider used.Domains
From this tab, an Organization Administrator can register and verify the domains that will be used. They can also access the table with the list of domains and view its detail view. The table shows the following information:- Domain name. Web address registered by the organization.
- Status. Verified or Unverified.
- Created on. Date and time the domain was created.
- Created by. User who registered the domain.
Create a domain
To configure a domain, it must first be registered and then verified.- Go to Organization → Domains.
- Click Create domain.
- Enter the organization’s domain (corresponding to the email of the users who will sign in with SAML).
- Click New.
Verify the domain
- In the Domains table, select the registered domain.
- A window will be displayed with instructions to add a TXT record in the DNS, which is required to verify ownership.
- Click Verify now to complete the process.
Create an SSO connection
Creating an SSO connection allows users with email addresses from specific domains to authenticate through the organization’s identity provider.- Go to Organization → SSO integrations.
- Click Create connection and follow the instructions in the wizard, which will guide the Organization Administrator in configuring and testing based on the identity provider used.
- Okta
- Entra ID
- Custom SAML
If any doubts come up during the configuration process, please contact your Flexxible representative.
Edit an SSO connection
The platform lets you edit an existing SSO connection, either to update the configuration or to renew the certificate if it has expired.- Go to Organization → SSO integrations.
- Select a record in the table.
- Click Edit connection.
Delete a domain
- Go to Organization → Domains.
- In the table, select the domain you want to delete.
- In the detail window, click Delete.
Delete an SSO connection
- Go to Organization → SSO integrations.
- Select the corresponding record in the table.
SCIM provisioning
System for Cross-domain Identity Management (SCIM) is a user provisioning and management standard that complements SAML authentication. It is optional, and its purpose is to automate the creation, updating, and deletion of user accounts on the Flexxible platform, keeping information synchronized between the organization’s identity provider (Okta, Entra ID, etc.) and the platform. When SCIM is enabled, the identity provider can send the platform basic user information (name, email, group), which makes it easier to manage onboarding and offboarding. This way, the user’s lifecycle is controlled centrally from the identity provider.Enable SCIM
To use SCIM, you must have previously configured SAML authentication:- Go to Organization → SSO integrations.
- In the table, select the corresponding SSO connection.
- Check the Enable SCIM user provisioning option.
- SCIM endpoint
- Authentication token
In environments with suborganizations, the SCIM integration must be defined in the parent tenant.
Configure SCIM in the identity provider
In the organization’s identity provider, enter the SCIM endpoint and the authentication token provided. Example with Entra ID:- Go to Provisioning.
- Enter the SCIM endpoint and the authentication token.
- Select the authentication method: Bearer token or Bearer Authentication.
- Click Test connection to validate the synchronization.
- Activate provisioning.
- If Okta is used as the identity provider:
- SCIM functionality must be configured using the Custom SAML option, since Okta does not support SCIM when the connection uses OIDC.
- When configuring the Custom SAML connection, the Application username format must be set to Email; otherwise, users will not be able to authenticate.
Create user groups in the identity provider
To integrate users via SCIM, you need to create groups in the identity provider.Considerations
- Create specifically dedicated groups with clear, unique names (e.g.,
MyOrg-Portal-L2). - When user groups are created or deleted in the identity provider, they are also automatically created or deleted on the platform.
- Do not create nested groups.
- A user must belong to only one group; otherwise, unexpected behavior may occur: on the platform, a user cannot have more than one role.
- There cannot be users without an assigned group.
- Users who belong to a group that does not have a linked role will not be visible in the Users list.
Role mapping
In the table on the SCIM provisioning tab, you can see the groups created in the identity provider. This happens because one-way synchronization has been established, from the identity provider to the platform. To map roles:- Go to Organization → SCIM provisioning.
- Select a synchronized group from the table.
- In the modal window, assign the corresponding role.
- If an organization (tenant) has suborganizations, choose which suborganization that group belongs to before assigning it a role.
Considerations about roles
- Every synchronized group must have a role assigned so its users are visible and functional.
- The same role can be assigned to different groups.
- The role assigned to a group can be modified at any time by following the same steps used to assign the role.
- In the Users list, you will see the Created by and Updated by columns to identify users managed by SCIM.
Role synchronization
The synchronization frequency depends on the identity provider used (for example, Entra ID synchronizes every 40 minutes), although it is possible to force a manual synchronization from the identity provider itself for testing purposes or urgent changes without waiting for the automatic cycle. To avoid depending on those intervals, the platform includes the Sync assigned roles button, which lets you align the roles of users belonging to groups created with SCIM. This action performs the following operations:- Reviews all users belonging to groups created via SCIM.
- Checks whether the role assigned to each user matches the role mapped for their group.
- If it detects discrepancies, it automatically updates the user’s role.