

Requirements
- Compatible network card.
- Enable WoL in the BIOS/UEFI.
- Configure WoL in the operating system.
- A bridge device—with FlexxAgent installed and reporting—on the same network as the device you want to power on.
WoL normally operates within a local network, and can work between subnets provided there are no restrictions imposed by firewalls or network devices that block the transmission of the magic packet. In environments segmented by subnets, you need to configure exceptions at the network level to allow the magic packet to be routed between those subnets.
Configure WoL on Windows
To configure WoL on a device running Windows, follow these steps:- Check whether WoL is active.
powercfg /devicequery wake_programmable
- Enable WoL.
powercfg /deviceenablewake "Realtek PCIe GbE Family Controller"
Replace “Realtek PCIe GbE Family Controller” with the appropriate driver name.
Available actions
Once the feature has been properly enabled and configured, the following actions will be available:- Schedule power-on in workspace groups
- Schedule power-on after applying updates
- Configure devices for Wake on LAN (WoL) in reporting groups
Schedule power-on in workspace groups
- Go to Workspaces → Workspace groups.
- Select the workspace group for which you want to schedule the power-on.
- Click the Schedule tab.
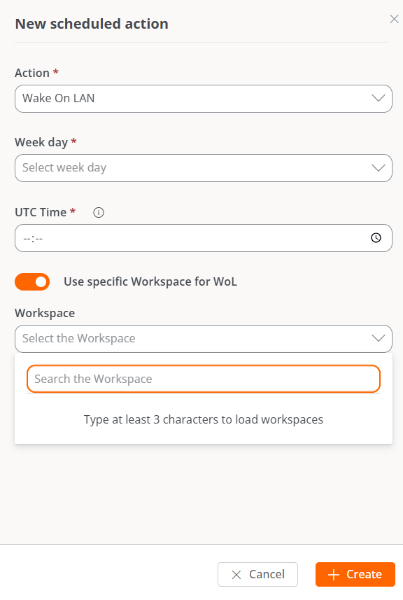
- Click the New button and complete the form.
- Action. Lets you choose between Wake on LAN or Shut down. If you select the first option, at the bottom of the form you can enable Use specific workspace for WoL, to schedule the power-on on a specific device.
- Day of the week. Day of the week when the action will be performed.
- UTC time. Exact time to start the action.
- Click New.
Schedule power-on after applying updates
- Go to Workspaces → Updates → Recipients.
- In the table, choose the recipient.
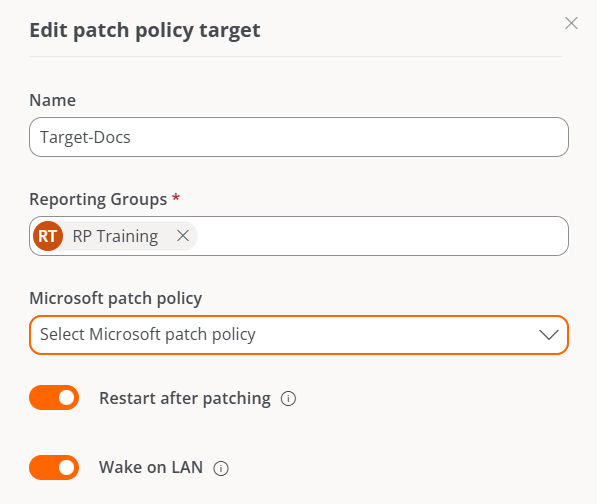
- On the Details tab, click the Edit button.
- Enable the Wake on LAN (WoL) option in the form.
- Click Save.
Configure devices for Wake on LAN (WoL) in reporting groups
This feature lets you define the specific devices that will run the automatic power-on via Wake on LAN (WoL) in the selected reporting groups.Configuration
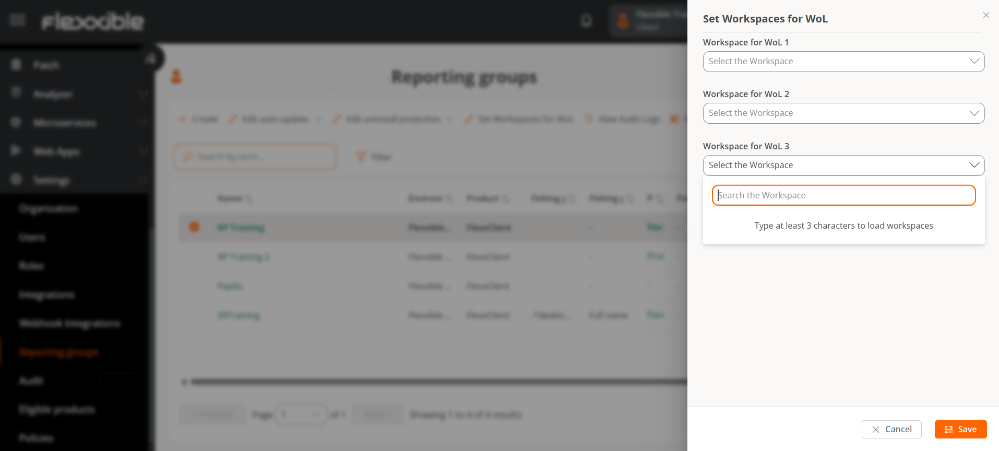
You can configure up to three devices to execute WoL, in case the process fails on one of them.- Go to Settings → Reporting groups.
- In the table, select one (or more) reporting groups.
- Click Configure workspaces for WoL.
- In the form, select the preferred devices that will be responsible for powering on the computers via WoL.
- Click Save to apply the changes.
Remove the WoL device configuration
To remove the devices associated with the WoL configuration:- Select the corresponding reporting group again.
- Click Configure workspaces for WoL.
- Leave the three fields without values.
- Click Save to confirm the removal.