

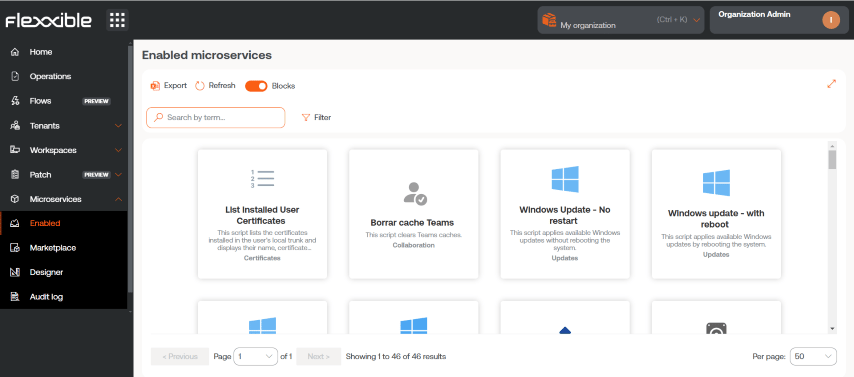
Detail of a microservice
By clicking on a microservice in the table, you access its detail view.Overview
Presents general information about the microservice, including its description, development language, compatible operating system, execution context, author, and creation date, among other relevant data.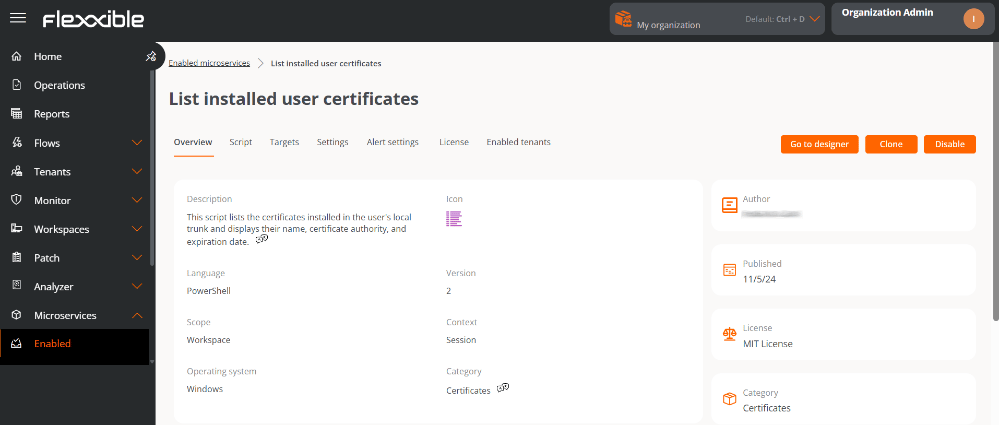
-
Go to designer
Allows you to edit the microservice’s configuration through the following tabs:
- Overview. General data of the microservice.
- Code. Source code of the microservice.
- Privacy. Information about the visibility of the microservice.
- Recipients. Execution conditions of the microservice.
- License. Allows you to configure the type of license of the microservice.
-
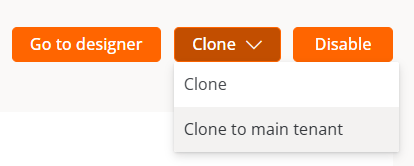
Clone
Opens the microservice creation form with the fields prefilled with the information of the microservice to be cloned, to create a new one based on that configuration.
Sub-organizations can clone a microservice from their environment to the main organization, which can subsequently publish it and make it available to the rest of the sub-organizations.
- Enable/Disable Shows the current state of the microservice. When enabled, the microservice becomes visible and can be executed on devices (context System) or on sessions (context Session), according to the configuration defined in the Designer section.
Code
Shows the source code of the microservice, including the logic and instructions that define its behavior.Recipients
Defines the execution conditions of the microservice.Execution by the end user
Specifies whether the microservice is enabled to be executed directly by the end user. This permission can also be modified using theEdit button.
The name of a microservice configured for execution by the end user must not contain special characters such as \ / : * ? ” < > or specific characters of certain languages that may vary depending on the keyboard layout.
A configuration change in an existing end-user microservice can take up to 15 minutes to be applied to all linked devices.
Configuration
Reports on the estimated time (in minutes) that using the microservice has saved the user compared to a manual solution to the same situation.Alert settings
Presents a table with the alerts linked to the microservice. For more information, please consult the documentation on Alert settings.License
Shows the type of license configured for the microservice.Enabled tenants
Allows you to enable/disable the microservice in bulk for the selected tenants and sub-organizations.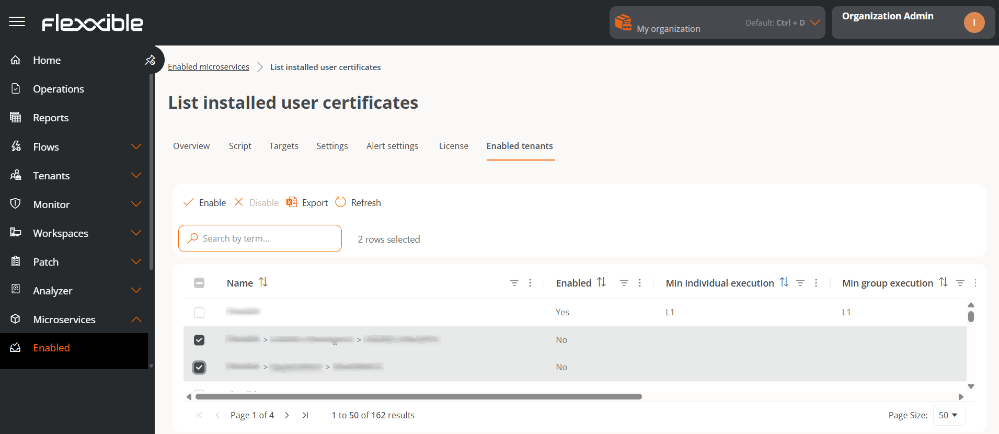
- Name. Name of the tenant. If it has sub-organizations, they are presented in tenant>sub-organization format.
- Enabled. Shows whether the microservice is enabled for the tenant.
- Minimum individual execution. Minimum roles with execution permissions at the individual device level.
- Minimum group execution. Minimum roles with execution permissions at the Workspace group level.
- Enabled on. Date and time the microservice was enabled for the tenant.
- Enabled by. Name and email of the user who enabled the microservice for the tenant.
- Disabled on. Date and time the microservice was disabled for the tenant.
- Disabled by. Name and email of the user who disabled the microservice for the tenant.
Considerations
- The list of available tenants depends on the microservice’s privacy configuration and the user’s permissions.
- Although the microservice can be enabled/disabled, the Recipients configuration is performed for each tenant independently.
Steps to enable/disable a microservice for tenants
- Go to Microservices → Enabled.
- Select a microservice.
- Go to the Enabled tenants tab.
- Select the desired tenants in the table.
- Click Enable or Disable, as appropriate.
- Read the warning message.
- Click Confirm.