

Create a microservice
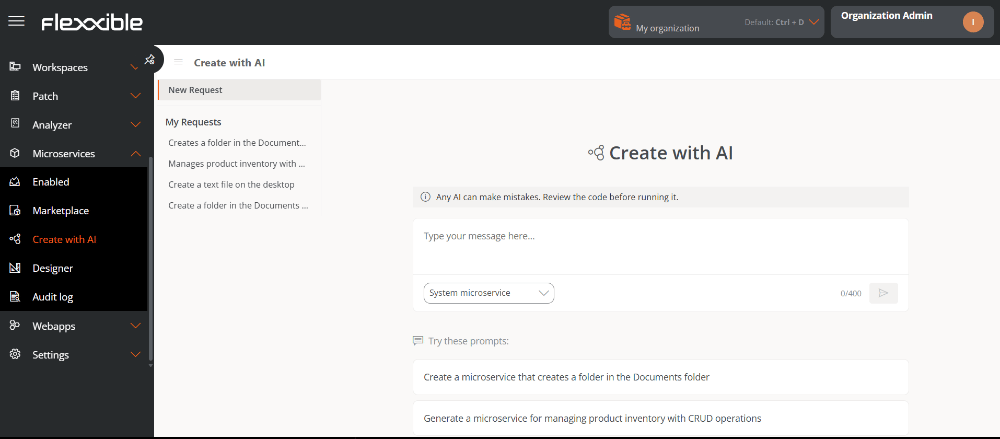
The steps to create a microservice through AI are as follows:- Go to Microservices → Create with AI.
- In the central panel, write the request in natural language and with a maximum of 400 characters. At the bottom, Try something like this offers examples that can help create a request.
-
In the drop-down, choose in which scope it will run: System Microservice or Session Microservice.
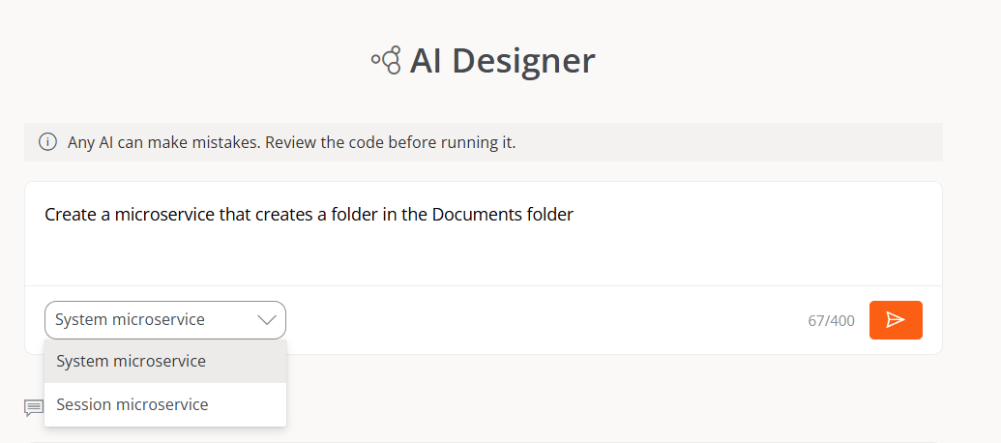
- Click the arrow in the orange box to continue.
-
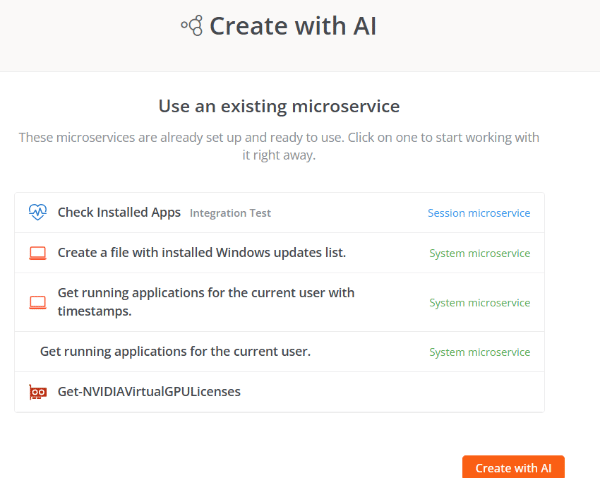
If there are similar microservices, they will be offered as available alternatives. The user can click on each of them to analyze their use in relation to the desired objective. When doing so, you will be redirected to the Marketplace section.
If, after reviewing the alternatives, the user considers that a new microservice must be created, they must click Create with AI.
-
A few seconds later, the AI will design the microservice.
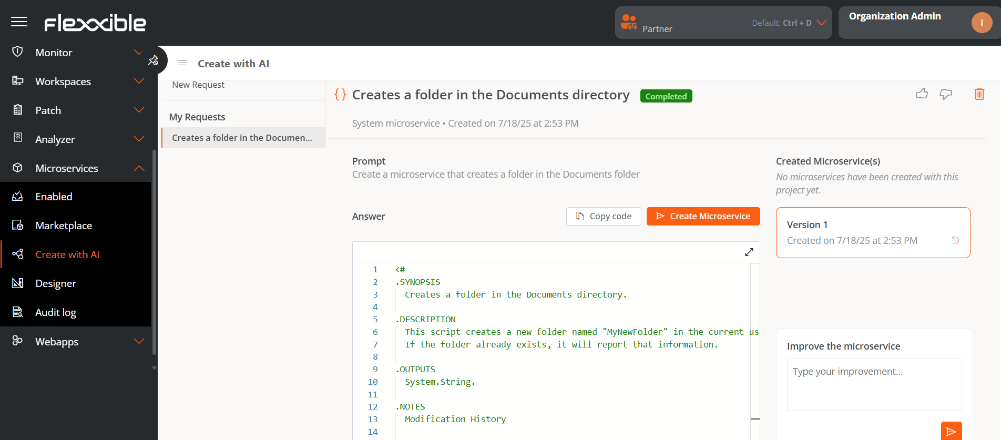
 This feature only generates microservices in PowerShell.
 -
Review the microservice code.
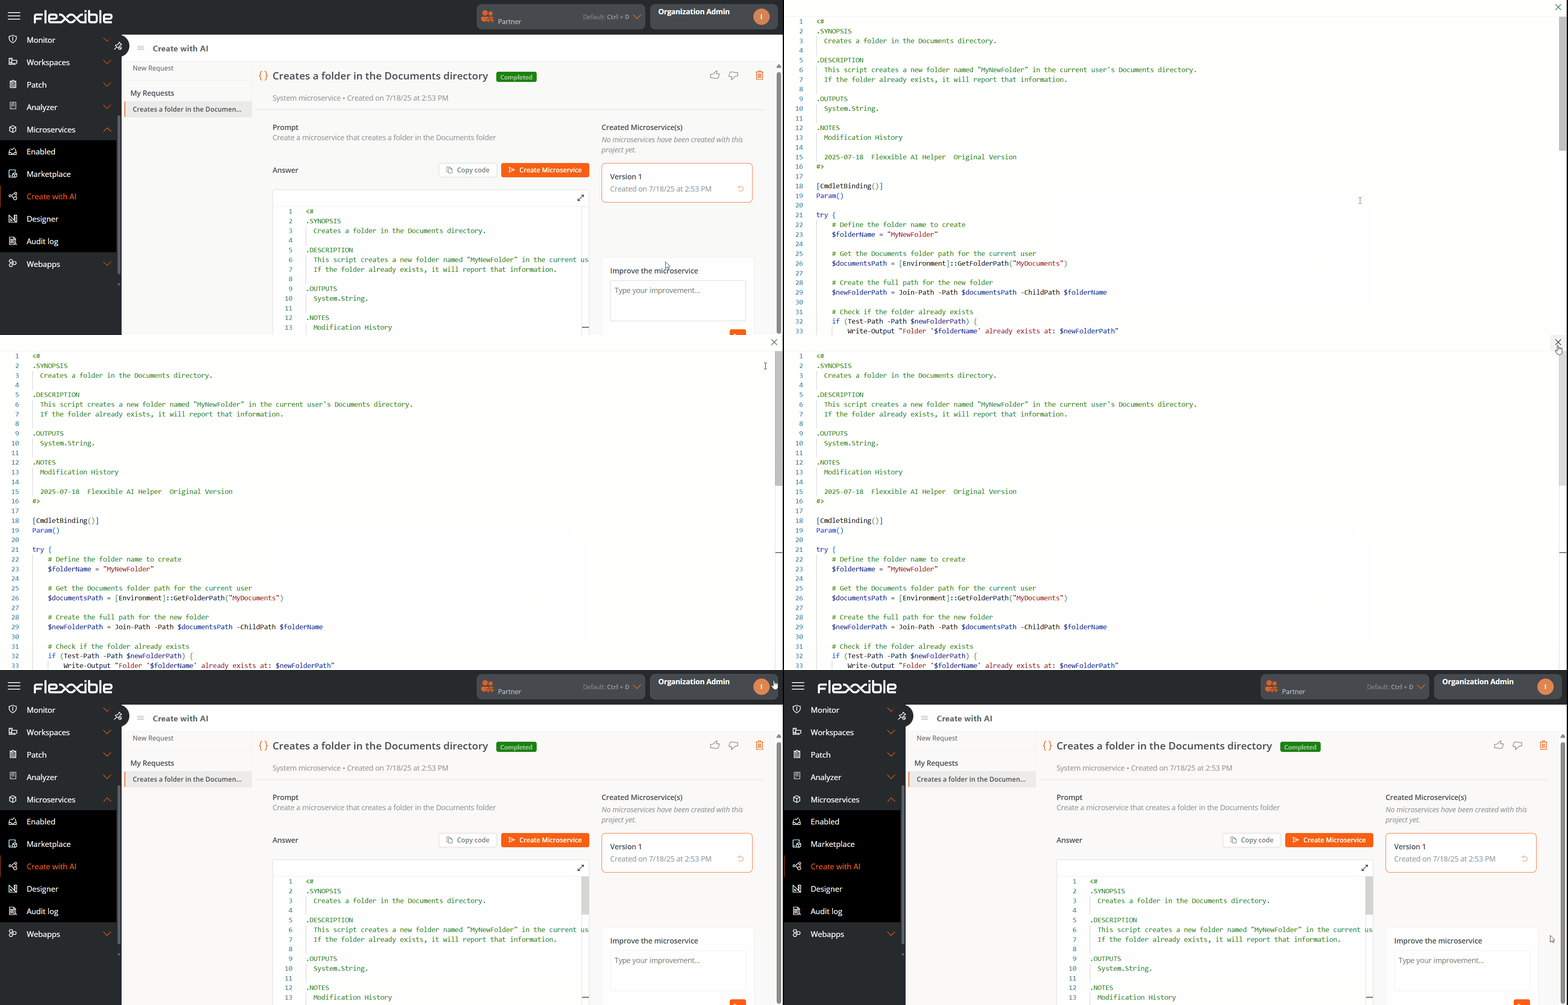
- The Improve the microservice box, located at the bottom right of the screen, allows the user to add information to optimize the microservice. With each improvement, a new version of the code is generated, which can be viewed in the Microservices created column, located at the top.
-
Click Create microservice.
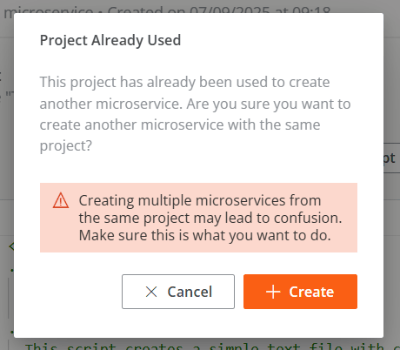
If you click Create microservice again on an existing microservice request, you will be asked for confirmation to verify whether you want to create a new one. If so, another microservice will be generated whose name will include a number at the end to differentiate it from the original. In no case will the code or configuration of an already created microservice be overwritten.
-
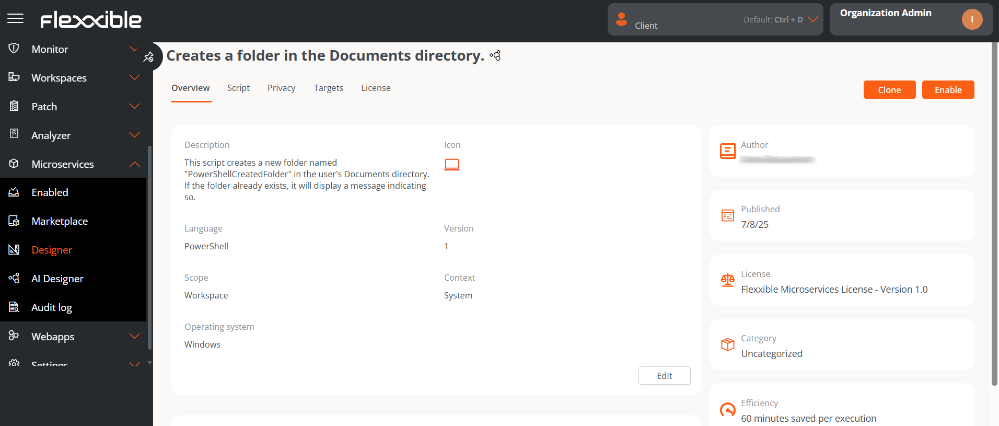
Next, the user will be directed to the Designer section to edit the microservice’s configuration, if desired.
- Click Save.
- The microservice will appear in the list of the Designer and Marketplace sections.
By default, microservices generated with AI are created without any category and have the Flexxible Microservices License license. This configuration can be modified in Designer.
Writing requests
The more detailed a request is, the more precise and useful the generated microservice will be. To achieve this, it is recommended that messages meet the following guidelines: 1. Concise- Avoid vague, redundant, or overly long phrases.
- Use direct language.
- Clarity should take priority over the number of words.
- Explain exactly what you want to obtain.
- Include details such as the output format, tools, objective, restrictions, etc.
- The more details provided, the better the result.
- Indicate where the action will be applied.
- If context is missing, the AI could create generic results.
- Specify the purpose of the microservice.
- It is suggested to use verbs that clearly indicate what the AI should do.
- Examples: create, do, analyze, generate, search, compare, etc.
Recommendations
In addition to writing clear requests, it is advisable to structure them so that the AI accurately understands what it should do and how to present the result. To achieve this, it is suggested to keep in mind the following recommendations:- Avoid ambiguity. Each request should have only one possible interpretation.
- Iterate and improve. If the result is not optimal, the request can be adjusted by adding more context.
- Use examples when possible. Showing an output model better guides the result.
- Specify the concrete action. Directly describe the task the AI should execute.
- Include reference examples. Show what the expected output should look like, to correctly guide the AI’s interpretation.
- Establish restrictions or rules. Indicate the limits, conditions, or requirements that must be met during execution.
- Define success criteria. Explain what conditions the result must meet to be considered satisfactory.
Examples of how to make a request
My requests
The My requests column, located on the left side of the screen, shows the microservice requests that the user has made to the AI. Each user can only see their own; they are not shared with the rest of the organization.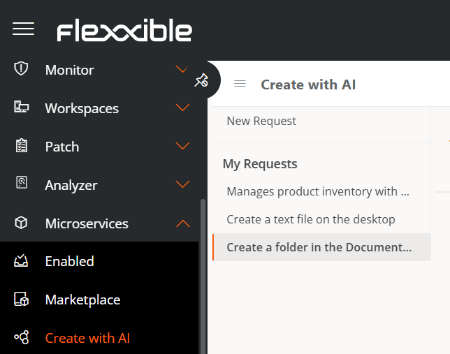

Delete a request
- Go to the My requests column, located on the left side of the screen.
- Click on a request from the list to enter the code detail.
- Click the Delete icon, located at the top right of the screen.
-
Read the warning message.
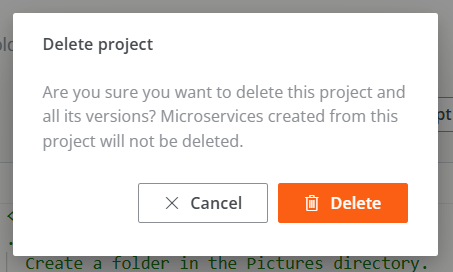
- Click Cancel or Delete, as appropriate.
Deleting a request does not mean deleting the microservice created from it.
Microservices created
On the right side of the screen, the Microservices created column presents the list of all microservices created from a request. This panel allows you to identify whether a request has resulted in one or several microservices, as well as access each one directly for review.-
When the AI designs the first version of a microservice, but it has not been created through the Create microservice button, the Microservices created column shows a message like the one in the following image:
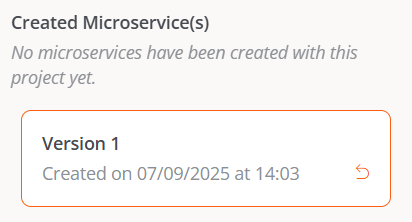
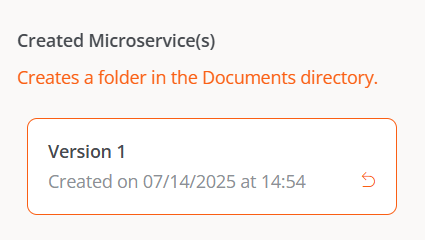
- When the AI designs the first version and Create microservice is clicked, the Microservices created column shows the name of the microservice. If clicked, its detail view is accessed in the Designer section.
-
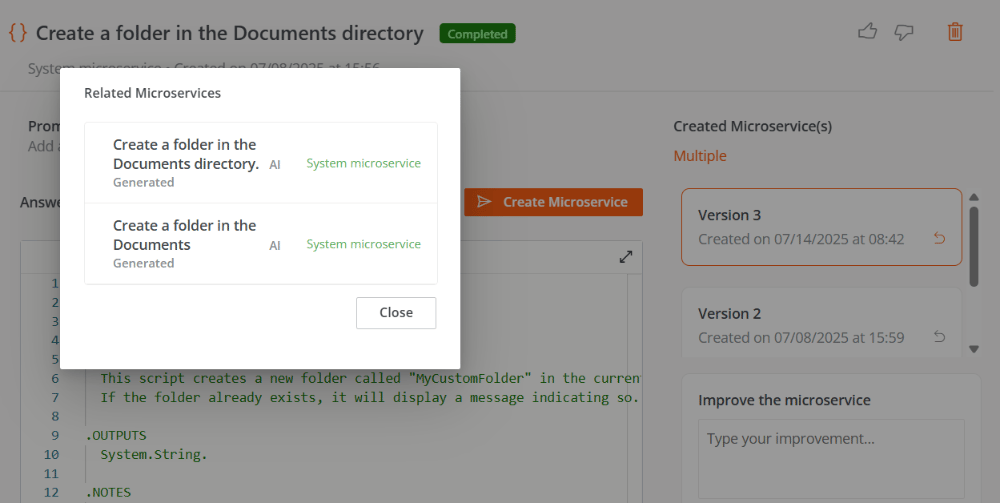
When the AI designs and creates more than one version of a microservice, the Microservices created column shows the word Multiple.
Clicking on Multiple opens a modal window with the list of microservices created from that request. Selecting one of them accesses its detail view in the Designer section.
Enable a microservice
The process to enable or disable an AI-generated microservice is the same as the one used to create microservices manually. Steps to enable a microservice from Designer:- Go to Microservices → Designer.
- Find the microservice in the list and click on it.
-
Click the Enable button, located at the top right of the screen.
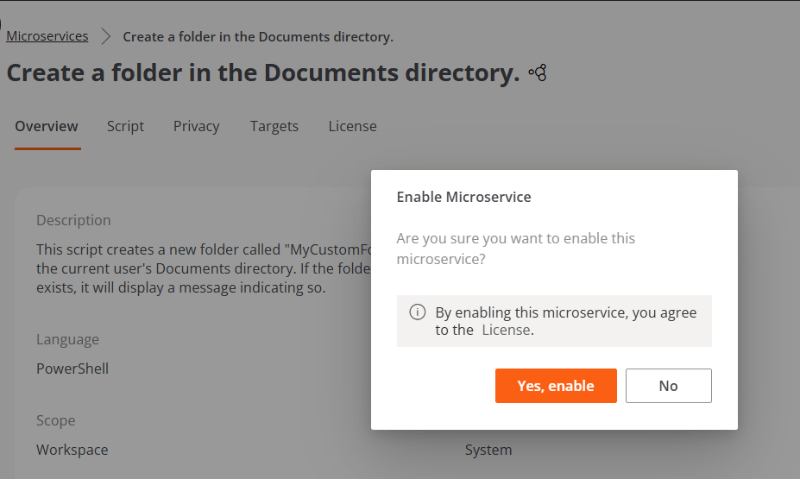
-
The microservice will appear marked with a green dot (sign of being enabled) in the Marketplace section.
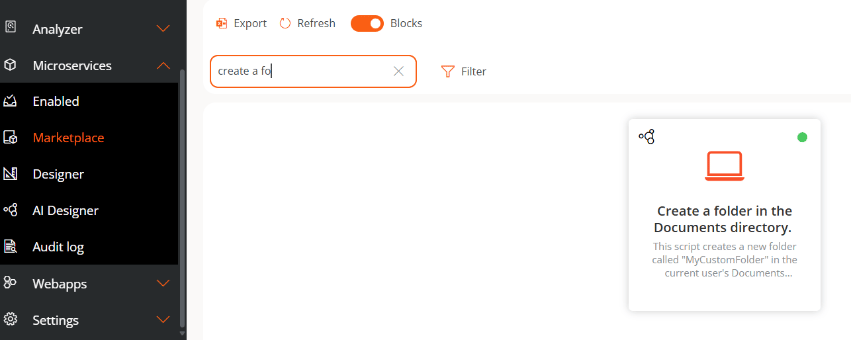
- Go to Microservices → Marketplace.
- Find the microservice in the list and click on it.
- Click the Enable button, located at the top right of the screen.
- The microservice will appear marked with a green dot (sign of being enabled).
Enable a microservice for the end user
The process of enabling a microservice created with AI for execution by the end user is the same as for microservices designed manually. Please refer to the Enable microservices for the end user guide.Flexxible recommends reviewing the
Privacy and Recipients tabs in the Designer section before enabling a microservice to verify that they have the desired configuration.