

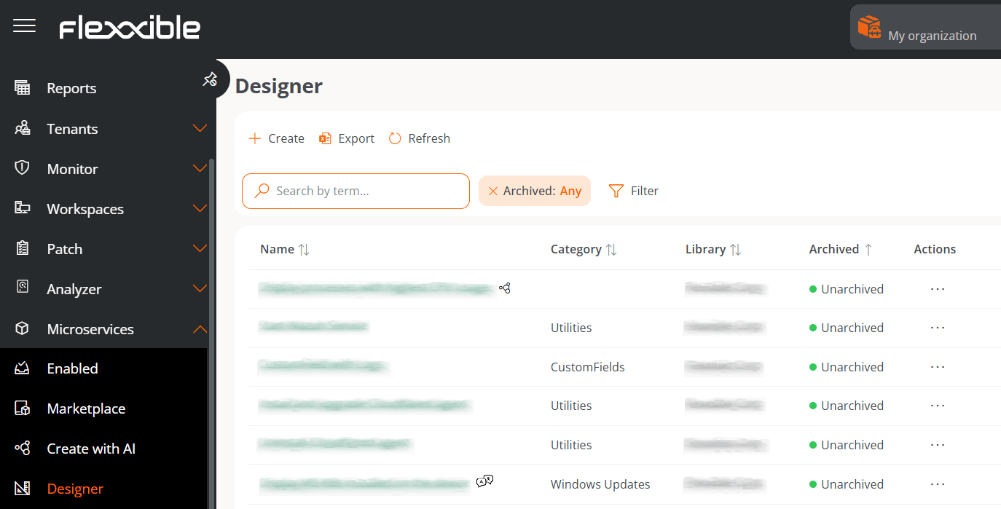
- Name. Name of the microservice.
- Category. Directory or group of microservices. Categories must be predefined in Organization.
- Library. Organization to which the microservice belongs.
- Archived. Indicates whether the microservice is Archived or Active. Archived ones are not available for use, while active ones are.
- Actions. Displays three options:
- View details. Shows the expanded information of the microservice.
- Edit. Allows you to modify the microservice’s configuration.
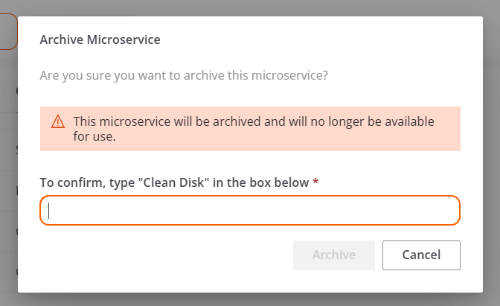
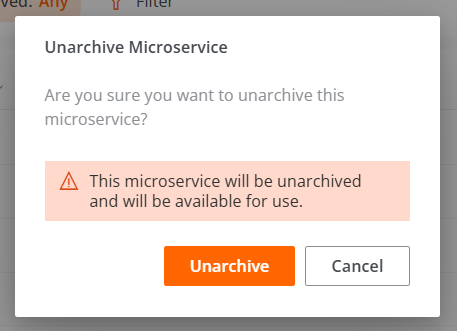
- Archive / Activate. Opens a confirmation window to archive or activate the microservice, according to its current state.
Create a microservice
The process of creating a microservice is carried out through a wizard divided into four phases, which guide the user step by step until the configuration is complete.Phase 1 - Initial configuration
- Go to Microservices → Designer.
- Click New.
- The wizard will open and prompt you to enter the following information:
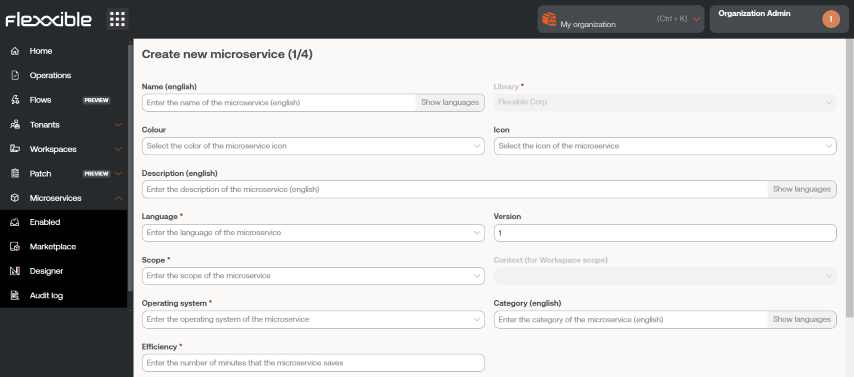
- Name. Name of the microservice.
- Color. Color of the representative icon.
- Icon. Type of associated icon.
- Description. Brief explanation of its functionality.
- Language. Programming language used.
- Version. Version number.
- Scope. Execution scope. You can select Workspace (context System or Session) or Platform.
- Operating system. Operating system for which it is designed.
- Category. Directory or group of microservices in which it will be housed. Categories must be predefined in Organization.
- Efficiency. Number of minutes the user saves with each execution.
- Click Next.
The name of a microservice configured for execution by the end user must not contain special characters such as \ / : * ? ” < > or specific characters of certain languages that may vary depending on the keyboard layout.
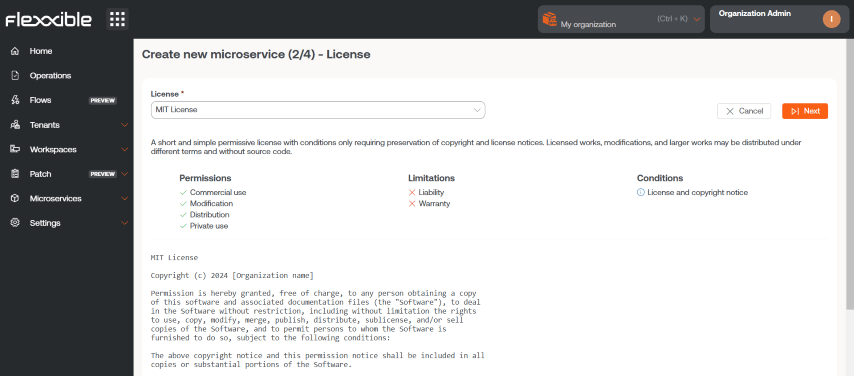
Phase 2 - License
- Choose from the drop-down options the type of license the microservice will have.
- Click Next.
Phase 3 - README
- Enter the detailed description of the microservice in Markdown format.
- Click Next.
# Title. Below are some examples of its syntax:
| Element | Markdown syntax | Preview |
|---|---|---|
| Bold | **bold** | bold |
| Italic | *italic* | italic |
| List | - List item | - List item |
| Link | [text](url) | text |
| Image |  |  |
| Code | `code` | code |
Phase 4 - Code
- Enter the microservice code.
- Click Next to finish.
Technical considerations
Although microservices allow the execution of any CMD or PowerShell command on Windows devices, the commands sent will be executed from the local administrator or from the user session, depending on the scope assigned to them. This may mean that some cmdlets do not have the expected output in relation to the execution performed. For this reason, if you are developing code in PowerShell, a series of considerations must be taken into account:- It is recommended that the version of PowerShell installed on the devices be the same as the one used to develop the microservices.
-
Microservices can be executed under the user session identity or from the local administrator.
-
Execution from the local administrator. In
Scopeyou can configureWorkspacesorPlatform, which greatly facilitates interacting with processes, services, and acting with administrative permissions on the device, but can make it difficult to access specific information about the user or their session. -
Execution from the user session. In
Scopeyou can configureSessions, which is very useful for accessing user information such as the registry, information contained in the profile, etc. Note that the script will run with the permission level the user has, so if the user is not a local administrator, they will have certain limitations when trying to act at the system level.
-
Execution from the local administrator. In
-
When you want to display some message in the microservice output, it is recommended to use the
Write-Outputcmdlet instead ofWrite-Host. - The execution output can be consulted in Operations.
Enable a microservice
To enable a microservice:- Go to Microservices → Designer.
- Find the microservice in the list and click on it.
- Click the Enable button (located at the top right).
- Once enabled, the microservice will be displayed with a green dot in the Marketplace section.
Delete a microservice
Before deleting a microservice, the following conditions must be taken into account:- Only microservices that have been previously archived can be deleted.
- The microservice must not be active in any tenant.
- No flow can have it assigned.
- Go to Microservices → Designer.
- In the microservices table, choose the desired element and click Actions → Archive.
- Confirm the action in the pop-up window to complete the archiving.
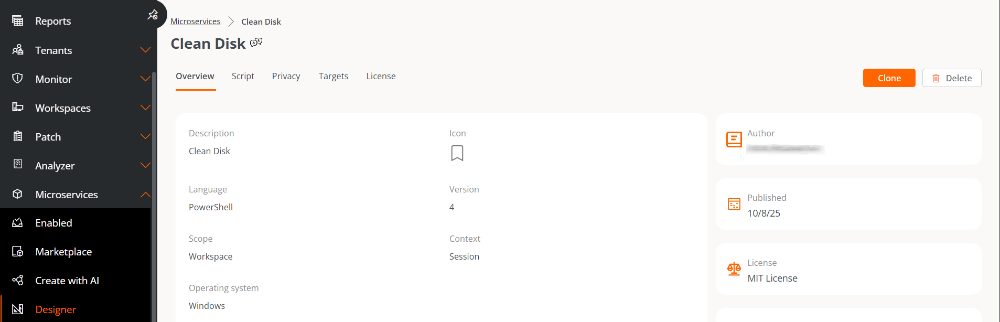
- Return to the table and click on the name of the microservice you just archived.
- From the Overview tab, click the Delete button.
- Confirm the deletion in the corresponding pop-up window.
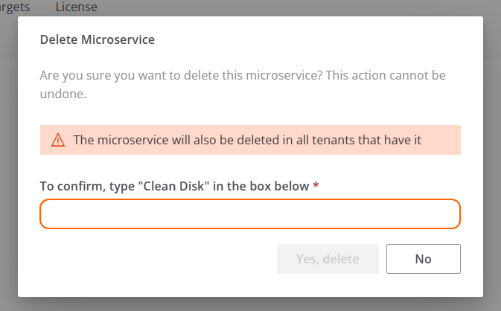
When deleting a microservice from the organization, it is also automatically deleted from the list of microservices of its tenants.