Apply proxy configuration via group policies (GPO)
In many cases, the organization's connectivity goes through a proxy; it could be for security, performance, or other reasons. This proxy configuration in FlexxAgent can be done in two ways: using a group policy (GPO) or during the agent installation. To configure the proxy using a group policy, follow these steps:
-
Access the domain controller's group policy management console. Create a new policy using the
Newoption from the menu that appears when you right-click onGroup Policy Objects.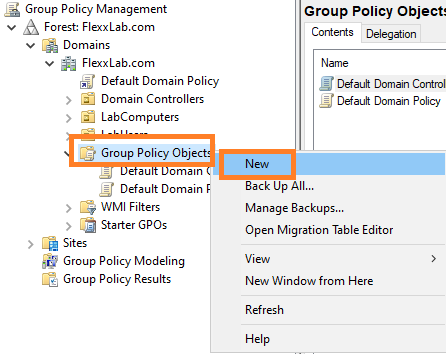
-
Give the new policy an appropriate name and click the
OKbutton. -
Select the policy with the right mouse button and edit it (select
Edit…) -
In the edit window, expand
Computer Configuration,Preferences, andWindows Settings. SelectRegistryand thenNew->Registry Item.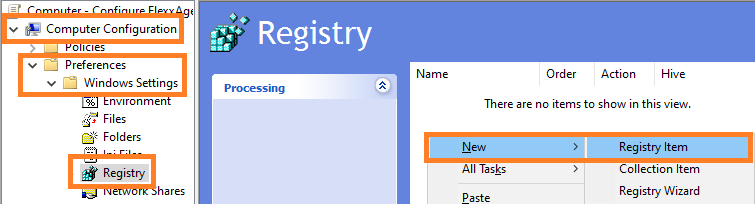
-
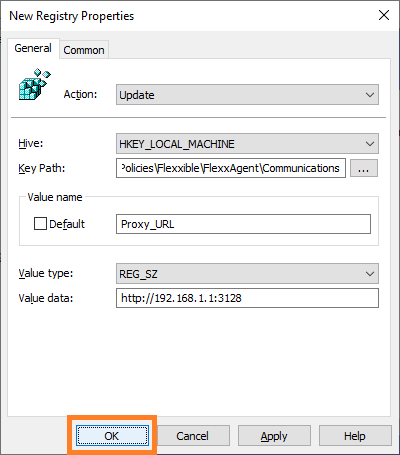
Add the following information and click
OK.- Action: Update
- Key path:
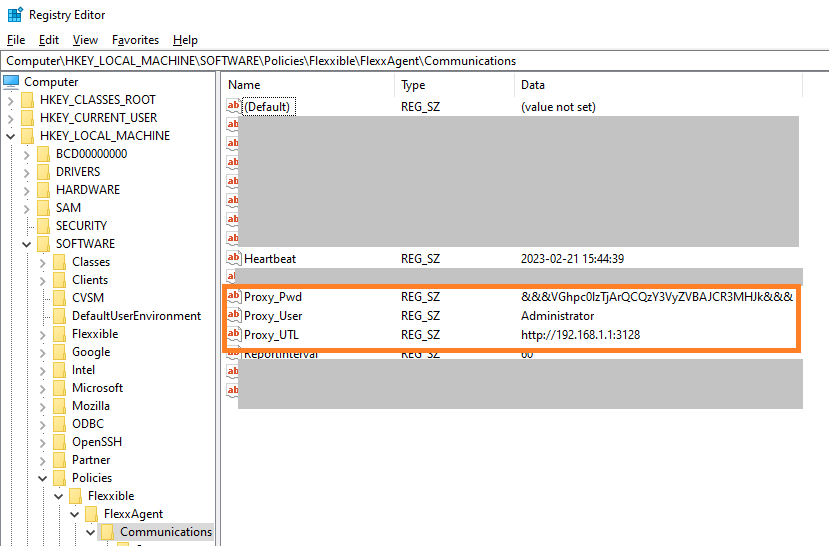
HKEY_LOCAL_MACHINE\SOFTWARE\Policies\Flexxible\FlexxAgent\Communications - Value Name: Proxy_URL
- Value type: REG_SZ
- Value data: the proxy's address (URL) and port number. For example
https://192.168.1.1:3128.
-
In the right panel, add a new registry entry again with the right mouse button, selecting
New->Registry Item.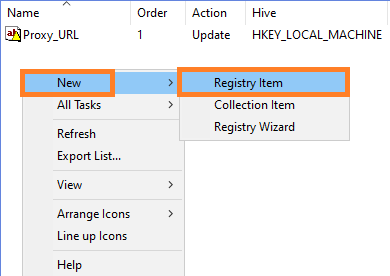
-
Add the following information and click
OK.- Action: Update
- Key path:
HKEY_LOCAL_MACHINE\SOFTWARE\Policies\Flexxible\FlexxAgent\Communications - Value Name: Proxy_User
- Value type: REG_SZ
- Value data: the username to authenticate to the proxy server. For example Admin.
-
In the right panel, add a new registry entry again with the right mouse button, selecting
New->Registry Item. -
Add the following information and click
OK.- Action: Update
- Key path:
HKEY_LOCAL_MACHINE\SOFTWARE\Policies\Flexxible\FlexxAgent\Communications - Value Name: Proxy_Pwd
- Value type: REG_SZ
- Value data: the password for authenticating to the proxy server, corresponding to the user configured in the previous step.
- The
Proxy_Pwdkey value can be filled in plaintext (not recommended) or encoded in base64 by putting the string&&&before and after it. Example:&&&VGhpc0lzTjArQCQzY3VyZVBAJCR3MHJk&&&. - In any case, FlexxAgent encrypts the value of this field at startup.
- To encode the password in base64, you can use a web service like https://www.base64encode.org/.
- The
-
Three registry entries will have been created in the group policy.

- Close the editor.
- With the right mouse button, select the list of devices that will receive this configuration within the domain controller (under the domain or organizational unit) and select
Link an Existing GPO.
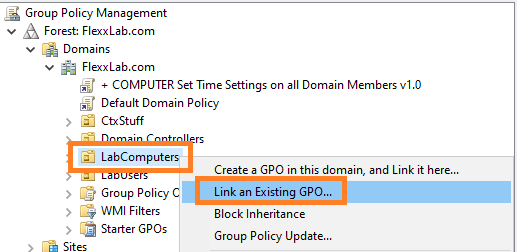
- Select the previously created group policy.
- The policy is linked to the devices selected in the domain controller.

- Optional step: if you want to verify on a computer that the group policy has been applied correctly, you need to restart the computer. Once it starts, you can go to the registry editor and check that the entries were created correctly.