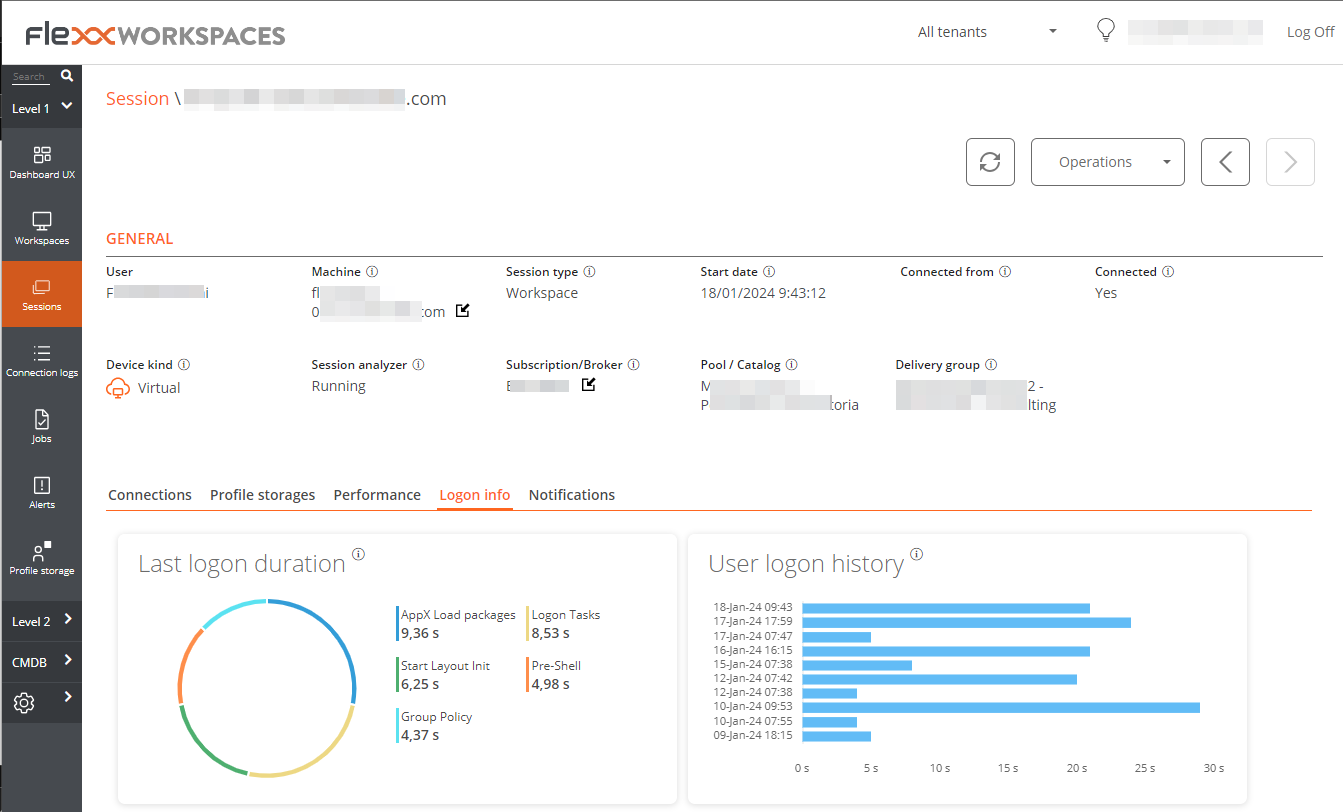
Workspaces
Workspaces is a unified support delivery and RMM solution, where different tools for monitoring, managing, and automating devices converge, as well as tools for interacting with users. Access can be segmented into levels, which ensures the delivery of appropriate tools to each technical or support team through role assignment.
Workspaces is ready to manage user sessions from any technology. FlexxAgent can identify the virtualization and brokering technologies used in each session.
Interface and Access Segmentation
The functionalities available in Workspaces are segmented into two levels, so access to them is granted through roles. Clicking on any level expands the menu options to access specific features.
Level 1
It gathers the tools for the teams that have the most direct contact with end users. Includes views of Dashboard UX, Workspaces, Sessions, Connections Logs, Jobs, Alerts, and Profile Storage. Functionalities available at this level:
Level 2
Offers tools that enable more detailed diagnostics, such as monitoring, event log filtering, server management, and more. Functionalities available at this level:
- Alert notification profiles
- Alert subscriptions
- Event log
- Notifications
- Servers
- Locations
- Networks
- Wireless networks
For FlexxDesktop deployments that use Azure Virtual Desktop subscriptions as a resource source for user sessions, the following features are included:
- Host pools (AVD)
- Power management policies (AVD)
- Power management activity (AVD)
List Views
List views allow you to filter and select items in the Workspaces and Sessions sections, to get lists such as devices with a certain amount of uptime, with pending reboots for updates, or that have not been used for a certain period of time, among others.
From the results, the listings can be used to perform specific tasks, such as running microservices, power actions, remote user assistance, and more.
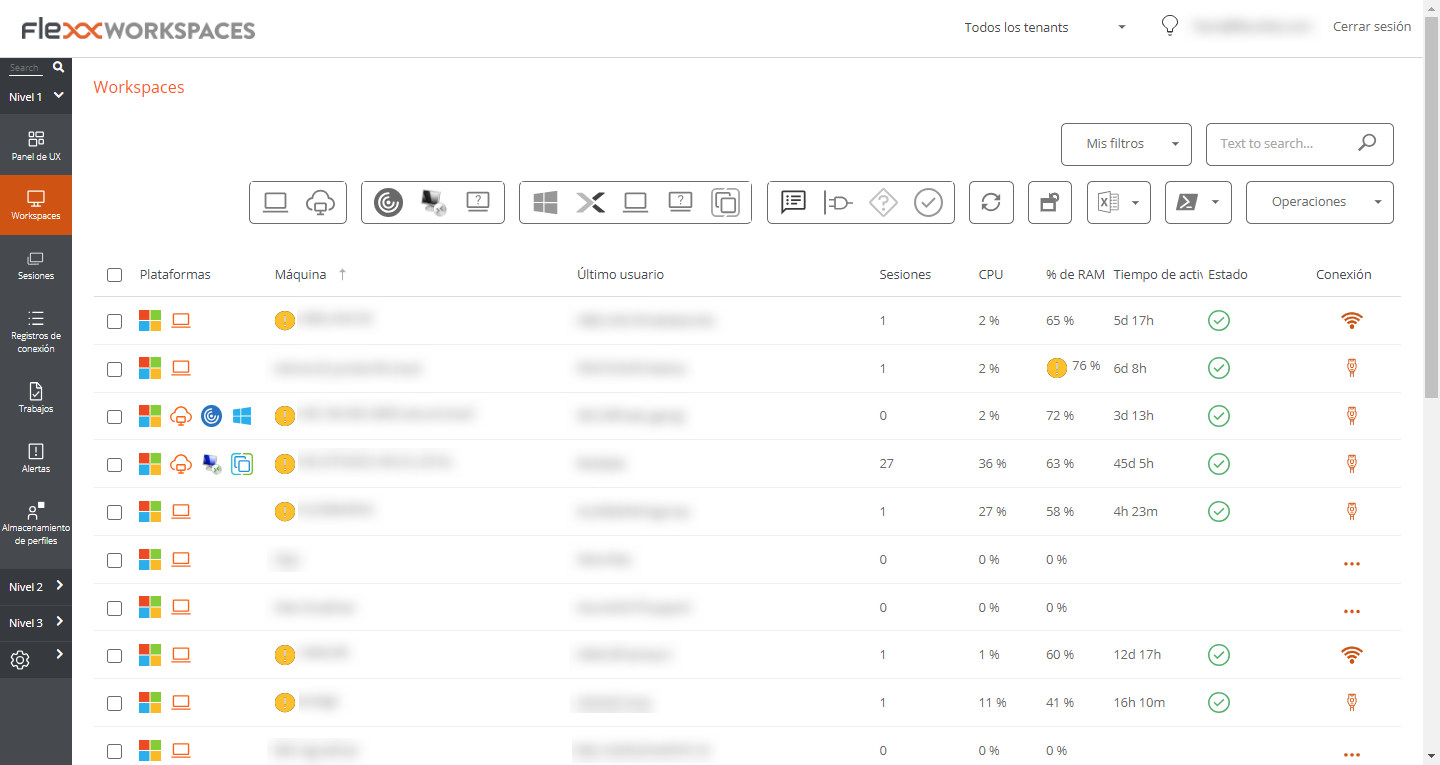
In addition to filtering, list views also offer other options, such as exporting the listings and saving the applied filters as user filters.
Filtering Options
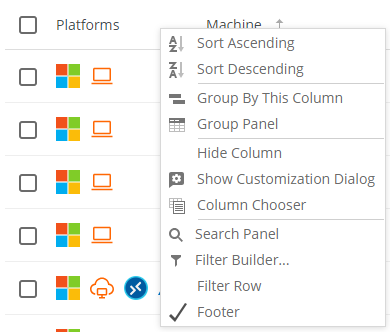
Grouping and filtering options are also available in the tables; with a right-click on the column header, you can see the options to sort the list:
- Sort and group by data.
- Hide columns or add others.
- Search all column values.
- Create a column filter or perform conditional searches using logical functions through
Filter builder.
Workspaces offers multiple tools in list views to filter, search, and group the contained information; these tools include:
- Column Sorting and Searching
- Grouping by Column
- Filter builder
- Filter management
- Available operations
- Detail views
Column Sorting and Searching

By clicking on one of the column headers, you can sort the values; with a right-click, you can open the context menu and activate Filter row to filter the content of that column within the value options.
Grouping by Column

To group records based on the fields of a column, right-click on Group by this column. This will create a group of records for each value of the column field used.
Column chooser
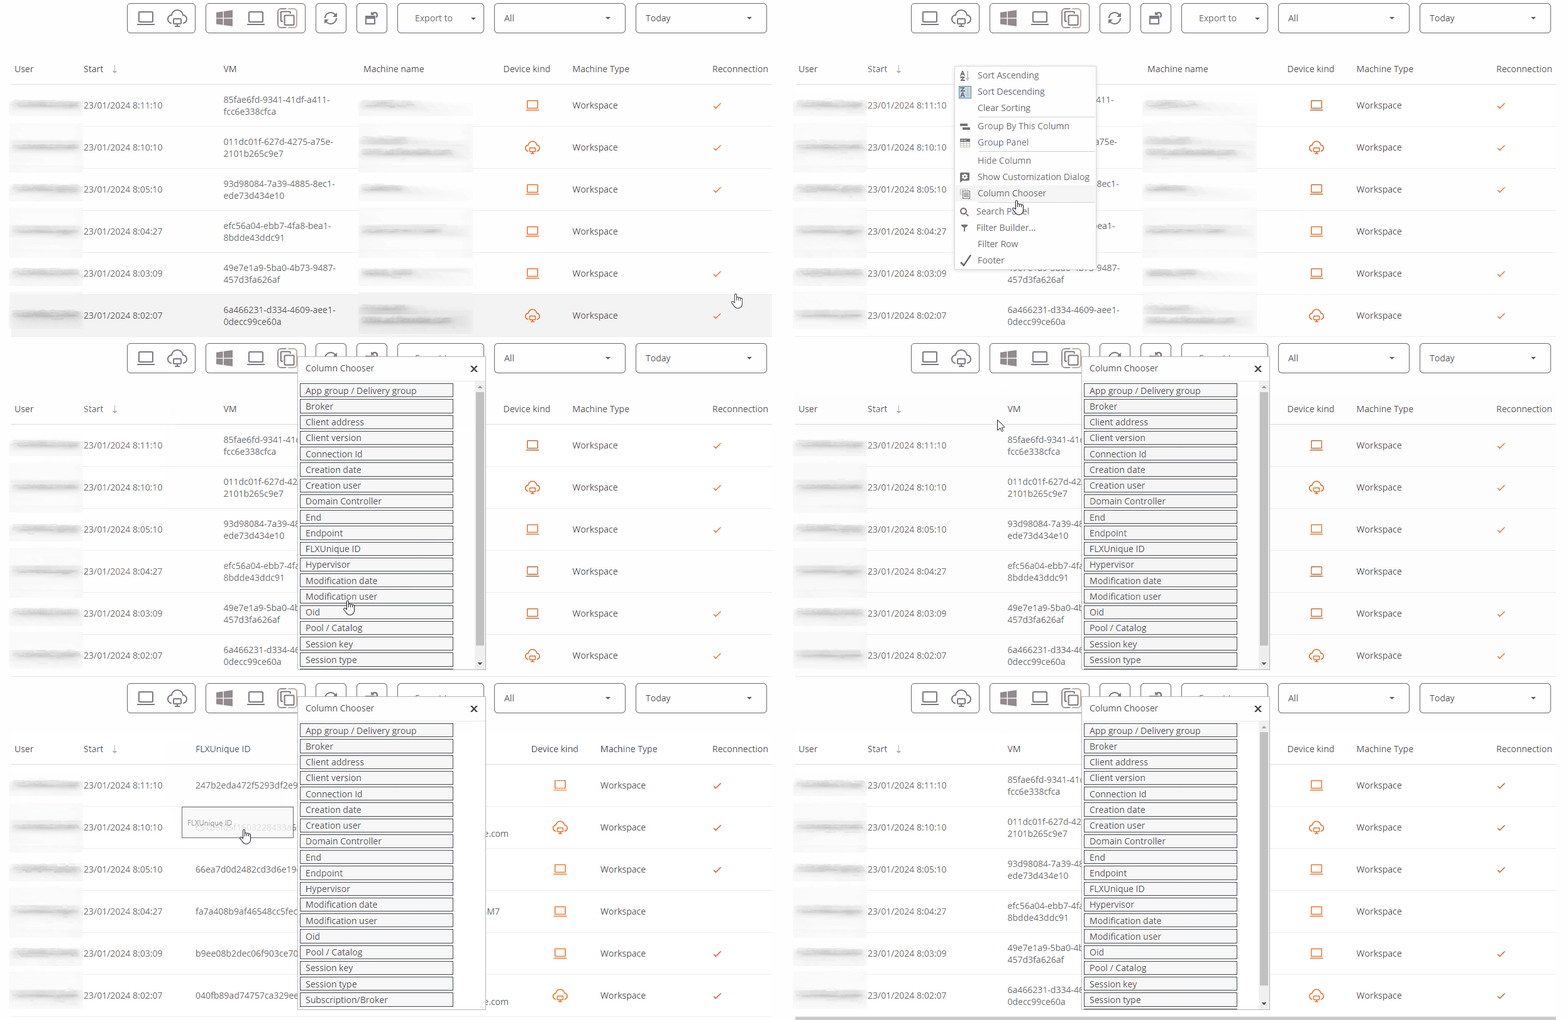
By right-clicking on the header of any column, you can access the advanced menu and Column chooser. This option allows you to modify the columns displayed in the header, adding or removing column headers.
Filter builder
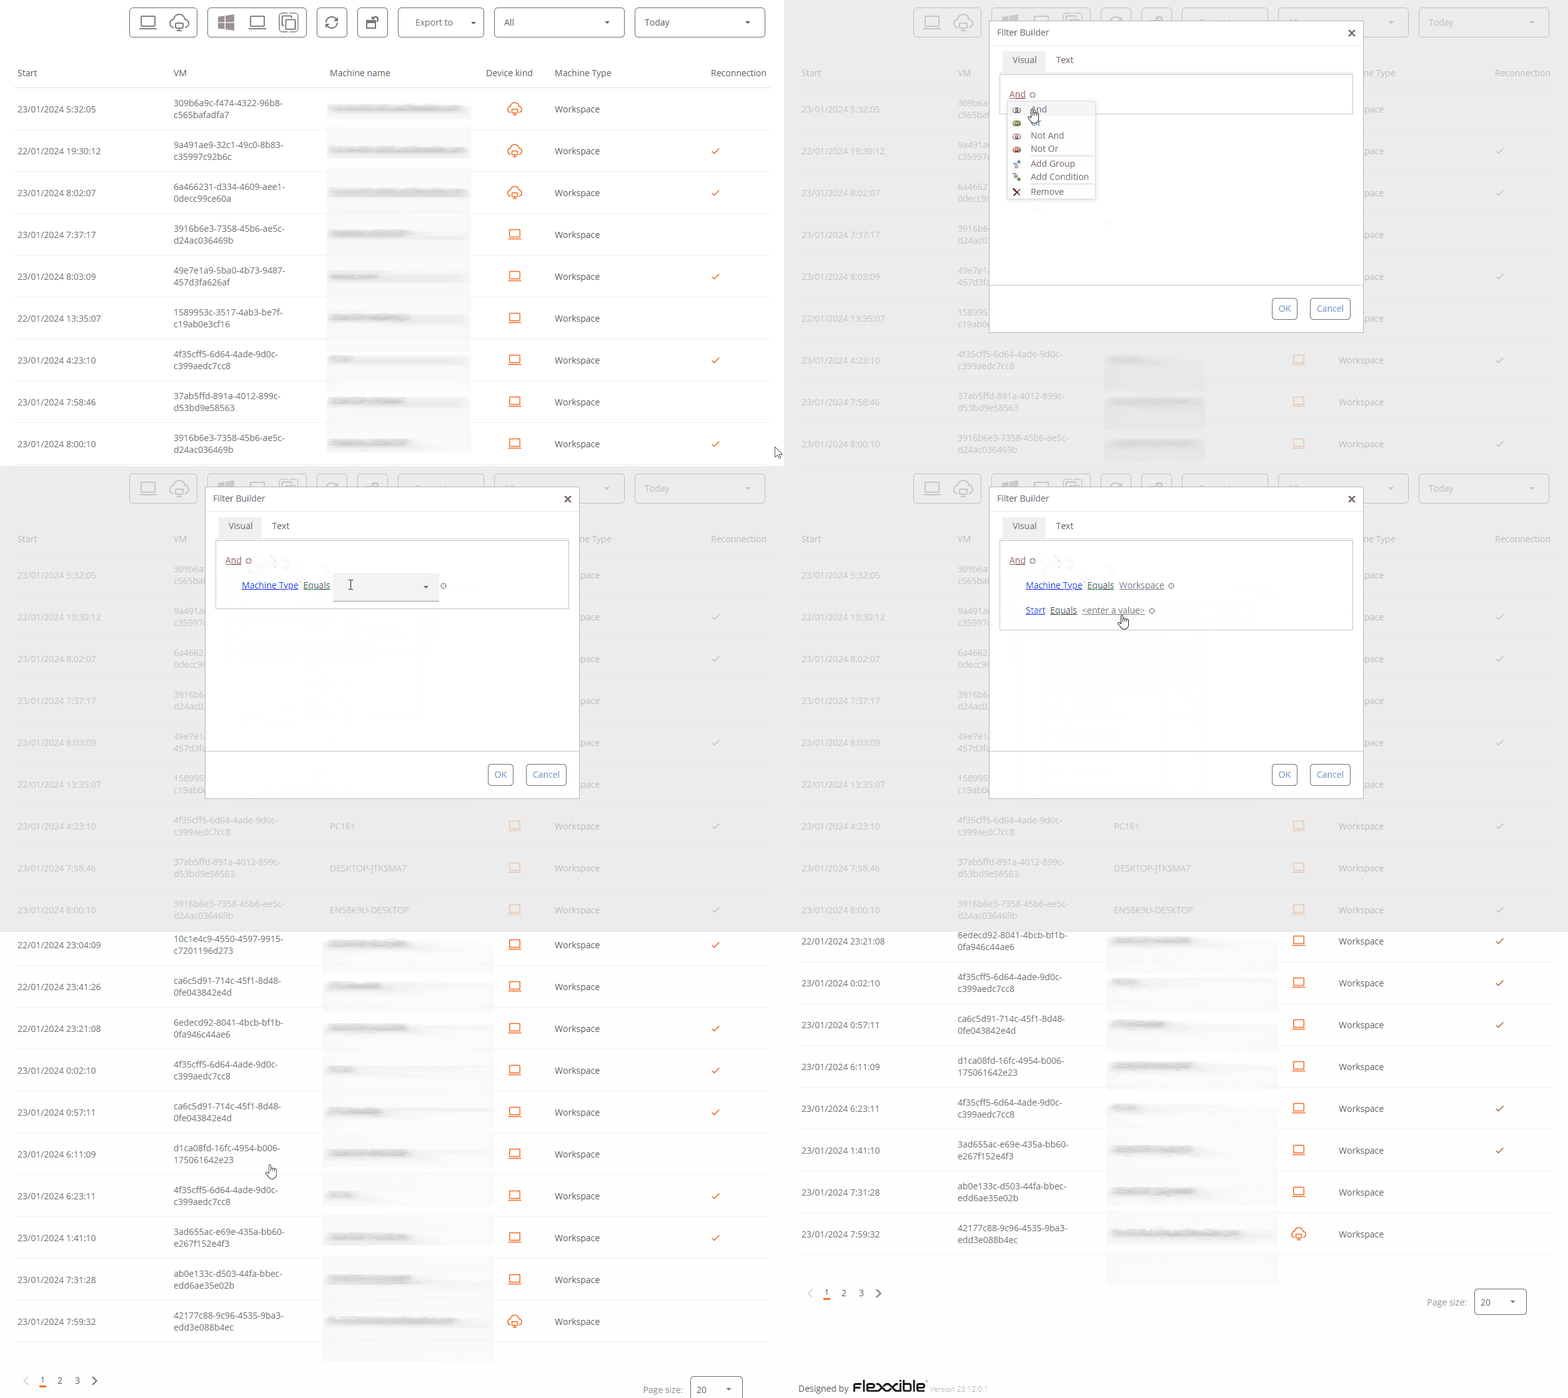
Filter builder allows you to construct filters by multiple criteria (inclusive and exclusive), analyze the content of fields, and nest queries.
Filter management
The My Filters button allows access:
- Default filters included by Workspaces
- User filters: filters saved by the user.
- User filter management options to save, modify, or delete.
- Opción de filtrado por unidad organizativa (OU)
- Opción de filtrado por sistema operativo (SO)
- Opción de filtrado por aplicación instalada
Below are the buttons that allow:
- Reset the default list view.
- Export the list: allows exporting the list with all details, in *.csv or *.xlsx format.
- Operations: centralizes various actions to facilitate device management.
Save a filter
If a user has applied one or more filters to the list of devices that Workspaces offers by default, and wishes to keep them for performing actions or returning to the new list later, they should click on the My filters -> Save current filter button and assign a name to the new filter. If no name is assigned, Workspaces will save the filter as Entry 1.
Available operations
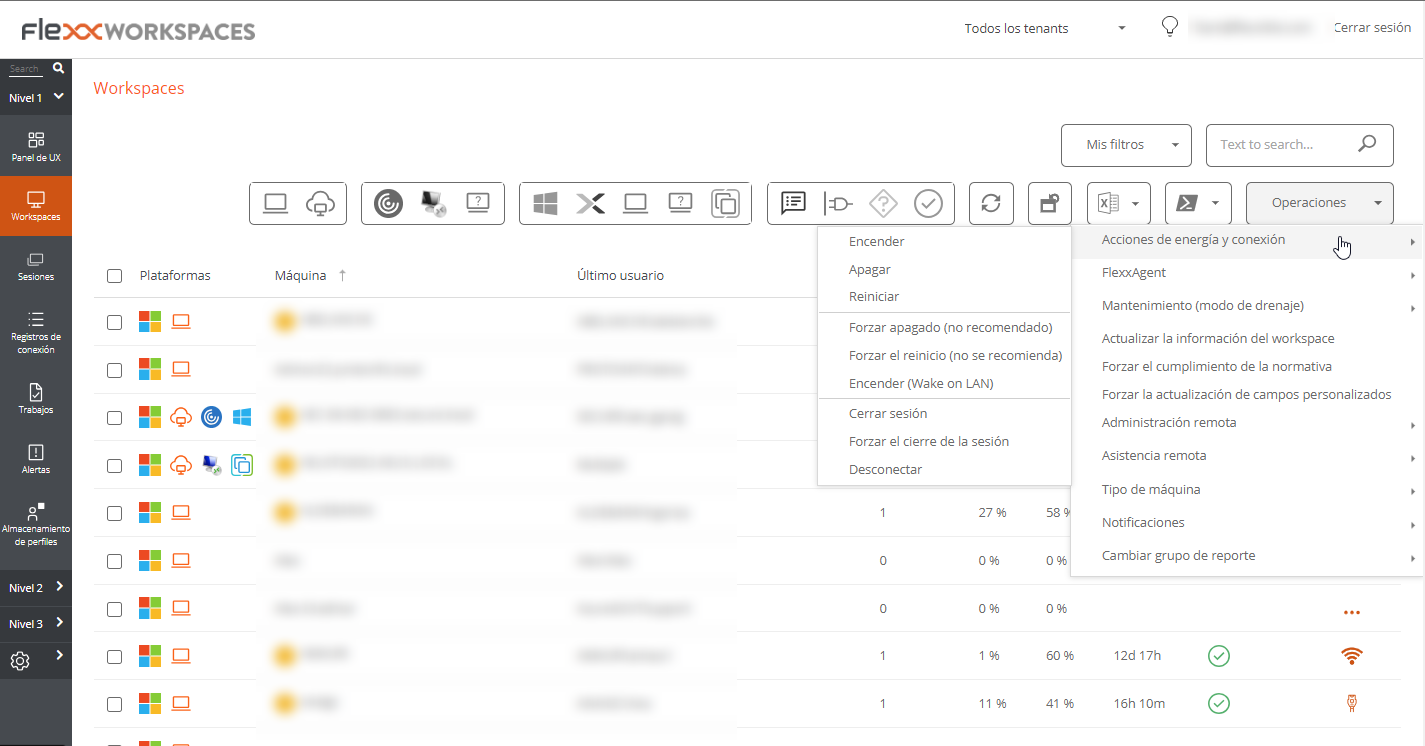
Depending on the list view from which the Operations button is activated, different actions will be accessed, such as shutting down the device, logging off the user, or sending a notification or remote support, among others.
Next to the operations button is the button to run microservices on demand.
Detail Views
Clicking on an individual item from a list view will display detailed information. The data is organized into inventory information blocks at the top of the screen; at the bottom, the information is segmented into tabs to facilitate navigation.
