> ## Documentation Index
> Fetch the complete documentation index at: https://docs.flexxible.com/llms.txt
> Use this file to discover all available pages before exploring further.
# Enable microservices for end users
Microservices allow you to run actions (checks or fixes) on devices, giving end users the option to run them on demand.
## How to enable a microservice for end users
1. Go to the **Microservices** → **Enabled** menu.
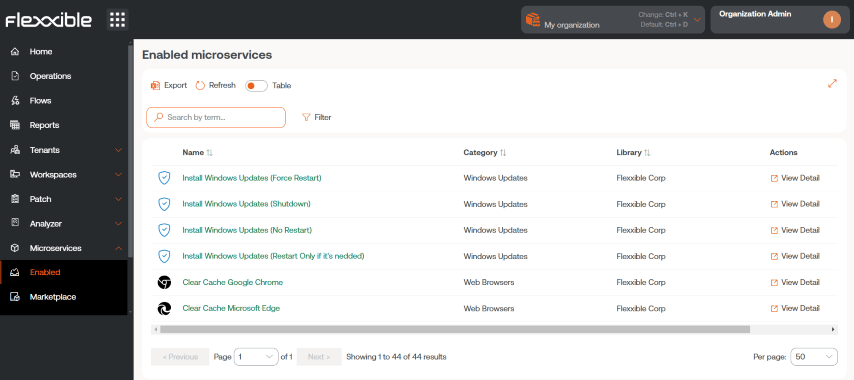 2. Select the microservice you want to enable by clicking its name (if they are organized as blocks) or the **View detail** link (if they are organized in a list). The microservice detail will then be displayed (in the example, "Clean disk").
3. Select the **Recipients** tab, which shows the execution permissions and recipients for this microservice.
4. Click the **Edit** button at the bottom right, inside the **End-user execution** section. A modal window will appear with the option to configure execution.
5. In the panel, enable end-user execution of the microservice and select one or more **Workspace groups** where this option will be valid.
2. Select the microservice you want to enable by clicking its name (if they are organized as blocks) or the **View detail** link (if they are organized in a list). The microservice detail will then be displayed (in the example, "Clean disk").
3. Select the **Recipients** tab, which shows the execution permissions and recipients for this microservice.
4. Click the **Edit** button at the bottom right, inside the **End-user execution** section. A modal window will appear with the option to configure execution.
5. In the panel, enable end-user execution of the microservice and select one or more **Workspace groups** where this option will be valid.
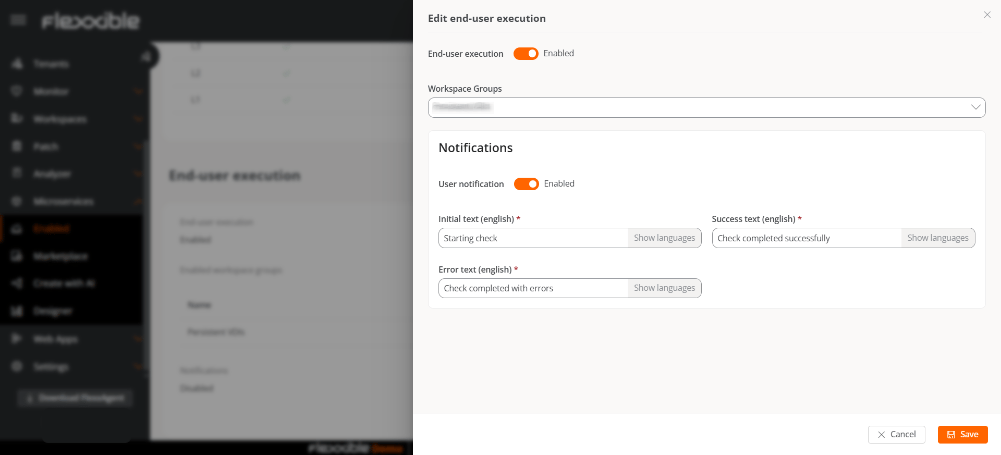 Optionally, you can configure the receipt of notifications.
#### Notifications
This option lets you define whether the user will be notified when the microservice starts running and when it finishes, either successfully or with errors.
To do so, enable **User notification** and complete the following fields:
* **Initial text.** Message shown when the microservice starts running.
* **Success text.** Message shown when execution finishes successfully.
* **Error text.** Message shown when execution finishes with errors.
Notifications will appear in the Windows notification bar.
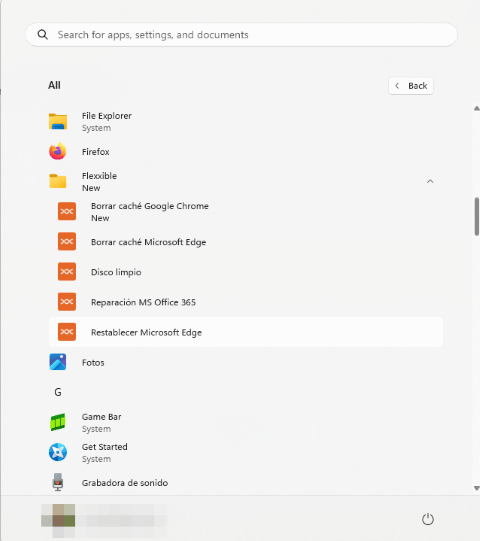
6. After clicking **Save**, within the next few minutes, the new microservice will appear as a new operating system option inside the *Flexxible* folder in the Start menu.
Optionally, you can configure the receipt of notifications.
#### Notifications
This option lets you define whether the user will be notified when the microservice starts running and when it finishes, either successfully or with errors.
To do so, enable **User notification** and complete the following fields:
* **Initial text.** Message shown when the microservice starts running.
* **Success text.** Message shown when execution finishes successfully.
* **Error text.** Message shown when execution finishes with errors.
Notifications will appear in the Windows notification bar.
6. After clicking **Save**, within the next few minutes, the new microservice will appear as a new operating system option inside the *Flexxible* folder in the Start menu.
 ### Change the name of the microservices folder
1. Go to **Settings** → **Organization**.
2. In the left-hand side menu, select **Microservices** → **Edit microservices configuration**.
3. Change the folder name.
4. Click **Save**.
#### Considerations
* The chosen name must be between 3 and 50 characters and may only contain letters, numbers, hyphens, and underscores.
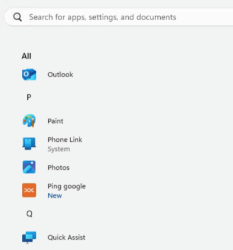
* If the device runs Windows 11 as its operating system and only one microservice is enabled for an end user, the *Flexxible* folder will not be displayed; instead, only the microservice icon will be shown in the Start menu.
### Change the name of the microservices folder
1. Go to **Settings** → **Organization**.
2. In the left-hand side menu, select **Microservices** → **Edit microservices configuration**.
3. Change the folder name.
4. Click **Save**.
#### Considerations
* The chosen name must be between 3 and 50 characters and may only contain letters, numbers, hyphens, and underscores.
* If the device runs Windows 11 as its operating system and only one microservice is enabled for an end user, the *Flexxible* folder will not be displayed; instead, only the microservice icon will be shown in the Start menu.
 ## Related information
For more information, see the [Microservices](../features/microservices/microservices) section.
## Related information
For more information, see the [Microservices](../features/microservices/microservices) section.