> ## Documentation Index
> Fetch the complete documentation index at: https://docs.flexxible.com/llms.txt
> Use this file to discover all available pages before exploring further.
# Integrate with Microsoft Entra ID
> Set up an integration with Microsoft Entra ID to sync information and create Entra ID-type workspace groups.
This integration lets you synchronize Entra ID information with the platform to create **Entra ID**-type workspace groups. These groups stay synchronized automatically and can be managed alongside the static and dynamic groups already available in the organization.
## Before you begin
Before creating the integration, you must have:
* Access to the platform with permissions to manage the organization's configuration.
* A Microsoft Entra ID tenant.
* An account with administrator permissions in Entra ID, or access to an administrator who can grant consent.
## Create the integration
1. Go to **Settings** → **Organization**.
2. Select the **Integrations** tab.
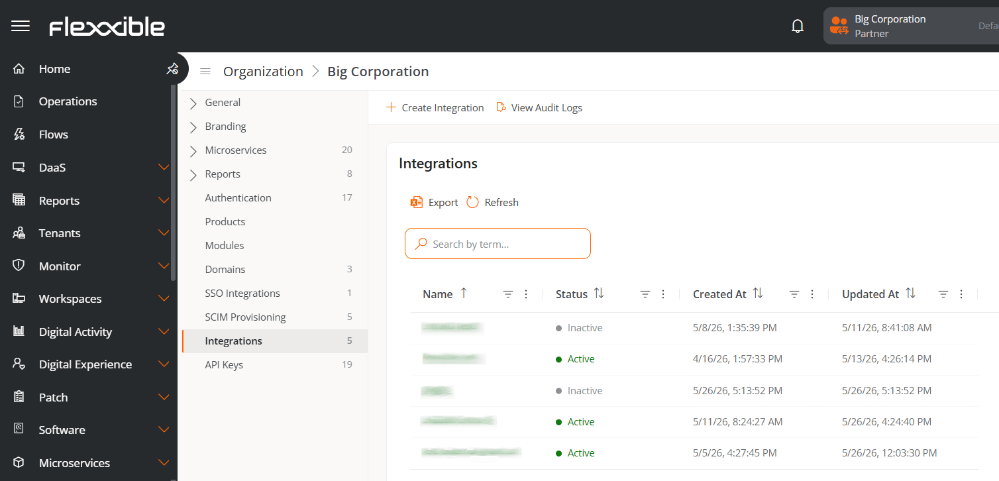 3. Click **Create integration**.
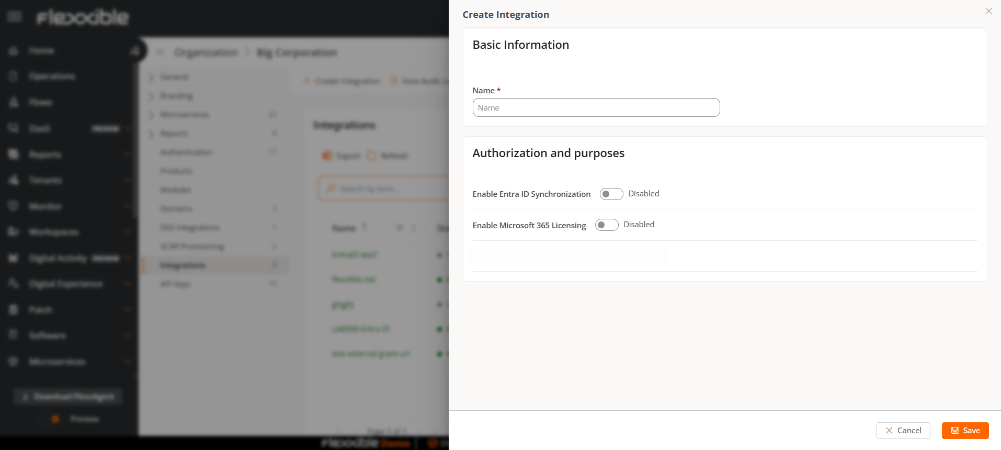 Under **Basic information**, enter the **Name** of the integration.
Under **Authorization and purposes**, enable **Enable Entra ID synchronization**.
Under **Basic information**, enter the **Name** of the integration.
Under **Authorization and purposes**, enable **Enable Entra ID synchronization**.
 ## Grant admin consent
To complete the integration, Microsoft Entra ID must authorize the permissions requested by Flexxible.
### If you are an Entra ID tenant administrator
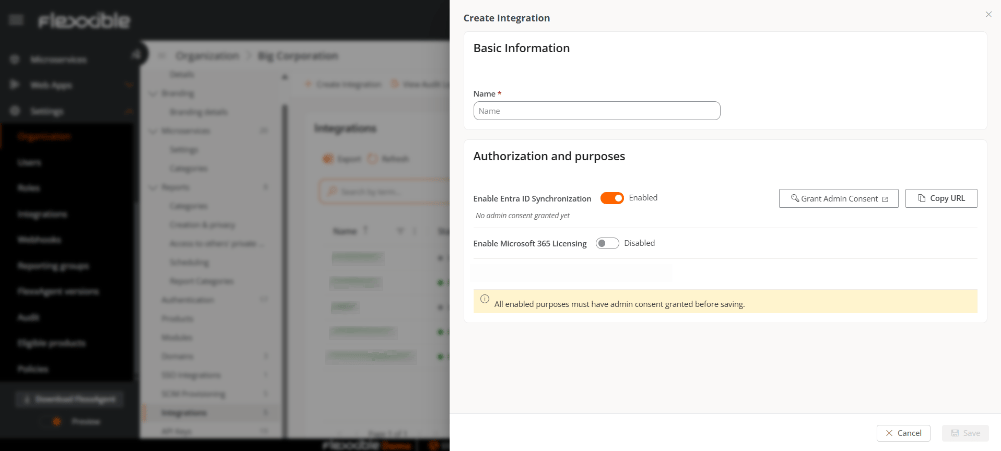
1. Click **Grant admin consent**.
2. Sign in with an account that has administrator permissions in Microsoft Entra ID.
3. Review the permissions requested by Flexxible.
## Grant admin consent
To complete the integration, Microsoft Entra ID must authorize the permissions requested by Flexxible.
### If you are an Entra ID tenant administrator
1. Click **Grant admin consent**.
2. Sign in with an account that has administrator permissions in Microsoft Entra ID.
3. Review the permissions requested by Flexxible.
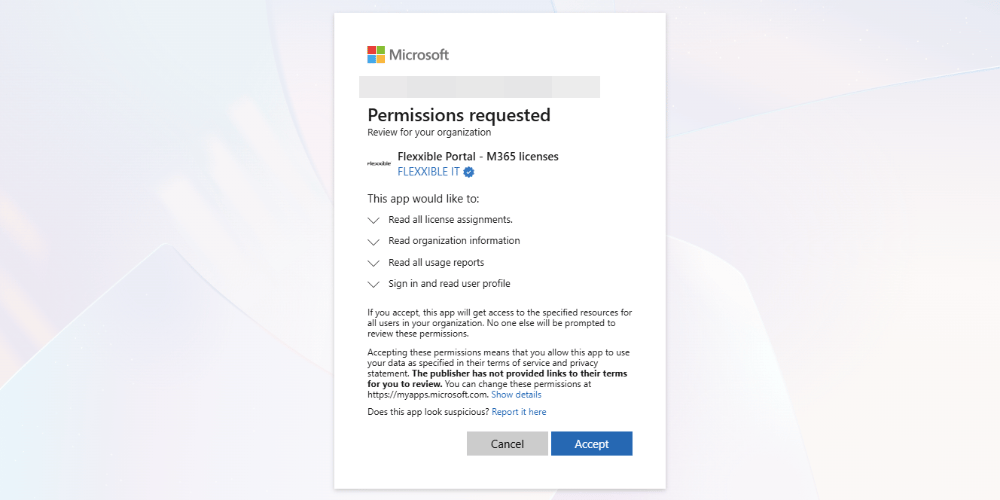 4. Confirm authorization.
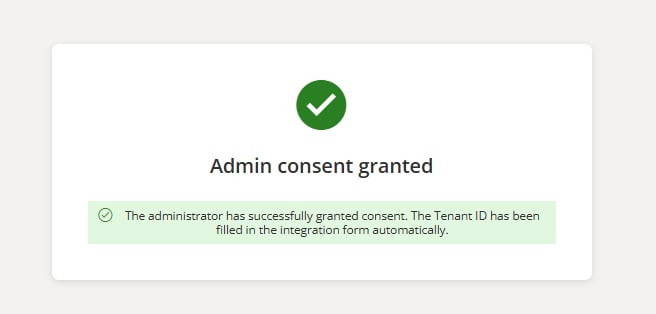 Once the process is complete, the integration will appear in the main **Integrations** table.
### If you are not an Entra ID tenant administrator
1. Copy the generated consent URL.
2. Send the URL to an Entra ID tenant administrator.
3. The administrator will need to access the link and complete the authorization process.
Once the process is complete, the integration will appear in the main **Integrations** table.
### If you are not an Entra ID tenant administrator
1. Copy the generated consent URL.
2. Send the URL to an Entra ID tenant administrator.
3. The administrator will need to access the link and complete the authorization process.
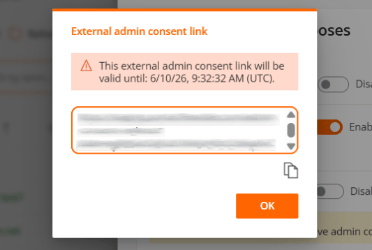 The consent link is valid for 24 hours.
## Verify the integration
Once permissions have been granted, the integration will appear in the main **Integrations** table.
From the integration detail view, you can check the date on which permissions were granted.
## Result of the integration
After enabling Entra ID synchronization:
* The platform will be able to create **Entra ID**-type workspace groups.
* The groups will remain synchronized automatically with Microsoft Entra ID.
* These groups can be managed alongside the organization's static and dynamic groups.
## Delete an integration
To delete an integration:
1. Go to **Settings** → **Organization**.
2. Select the **Integrations** tab.
3. In the table, click the integration you want to delete.
4. Click **Delete**.
5. Confirm the operation.
## Related information
For more information about integrations, see the [Integration](../features/administration/organization) section.
The consent link is valid for 24 hours.
## Verify the integration
Once permissions have been granted, the integration will appear in the main **Integrations** table.
From the integration detail view, you can check the date on which permissions were granted.
## Result of the integration
After enabling Entra ID synchronization:
* The platform will be able to create **Entra ID**-type workspace groups.
* The groups will remain synchronized automatically with Microsoft Entra ID.
* These groups can be managed alongside the organization's static and dynamic groups.
## Delete an integration
To delete an integration:
1. Go to **Settings** → **Organization**.
2. Select the **Integrations** tab.
3. In the table, click the integration you want to delete.
4. Click **Delete**.
5. Confirm the operation.
## Related information
For more information about integrations, see the [Integration](../features/administration/organization) section.