> ## Documentation Index
> Fetch the complete documentation index at: https://docs.flexxible.com/llms.txt
> Use this file to discover all available pages before exploring further.
# Deploy FlexxAgent via Group Policies (GPO)
> Guide for deploying the agent unattended using GPOs
FlexxAgent can be deployed on Windows using Group Policies (GPO). To do so, you need access to the agent installation package, which can be downloaded from the Flexxible portal.
## Deployment
1. Create a PowerShell script called `.Install.ps1` with the following content:
Start-Process `Path to file\FlexxAgent-Installer.exe` /verysilent /AgentConfig="`Path to file\settings.conf`"
Example:
```
Start-Process C:\Temp\FlexxAgent-Installer\FlexxAgent-Installer.exe /verysilent /AgentConfig="C:\Temp\FlexxAgent-Installer\settings.conf"
```
Make sure that, in addition to the executable, the line includes the parameters required for the installation, such as the proxy, if needed.
2. Save the file for later use.
3. Run the Windows Group Policy Management Console on a domain controller that has the remote computer management tools installed.
4. Create a new Group Policy inside the Group Policy container.
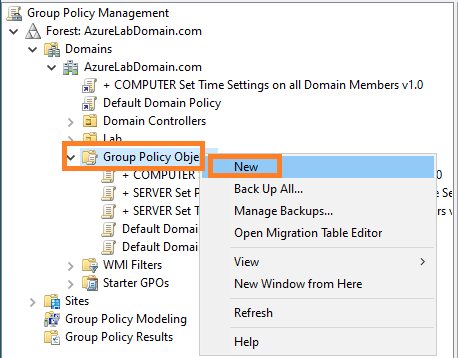 5. Give the new policy a name. Choose one that is meaningful.
6. Right-click the Group Policy and select `Edit`.
7. Expand the tree `Computer Configuration` -> `Windows Settings` and select `Scripts (Startup/Shutdown)`
5. Give the new policy a name. Choose one that is meaningful.
6. Right-click the Group Policy and select `Edit`.
7. Expand the tree `Computer Configuration` -> `Windows Settings` and select `Scripts (Startup/Shutdown)`
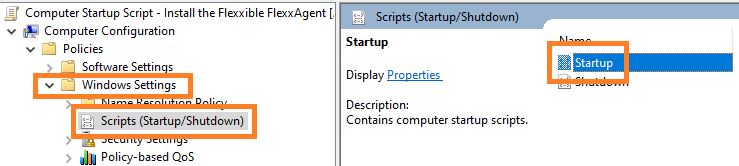 8. A dialog will appear in a new window. In it, select `PowerShell Scripts`. Then click the `Show Files…` button.
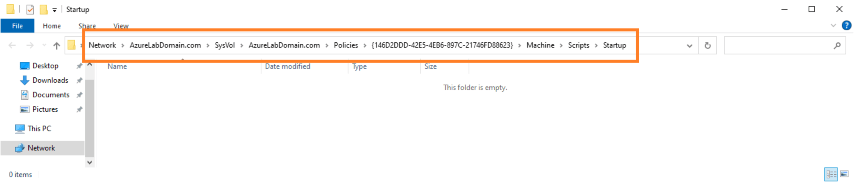 9. The network folder where the scripts for the Group Policy are stored will open.
10. Copy the `Install.ps1` file that you created at the beginning and paste it inside the network folder that stores the Group Policy scripts.
9. The network folder where the scripts for the Group Policy are stored will open.
10. Copy the `Install.ps1` file that you created at the beginning and paste it inside the network folder that stores the Group Policy scripts.
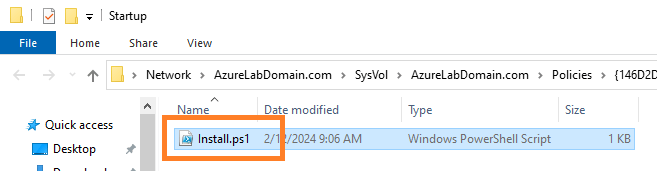 11. Close the Windows Explorer window that provided access to the folder with the Group Policy scripts.
12. The modal window for the startup script properties will appear again. Click the `Add…` button.
13. A dialog will appear to select files. Look for the script to use with the `Browse…` button.
14. The previous path will open, where the file created at the start of the procedure is located. Double-click it, or select it and click the `Open` button.
15. Once the file is selected, click OK to close the dialog. The file will appear in the configuration modal window.
16. Select `OK` to close this window. You will return to the Group Policy editor. This window can be closed.
17. Locate the branch of the organization, inside the domain controller, where the devices on which you want to install FlexxAgent are located. Select the branch and right-click it. `Select Link an Existing GPO`.
11. Close the Windows Explorer window that provided access to the folder with the Group Policy scripts.
12. The modal window for the startup script properties will appear again. Click the `Add…` button.
13. A dialog will appear to select files. Look for the script to use with the `Browse…` button.
14. The previous path will open, where the file created at the start of the procedure is located. Double-click it, or select it and click the `Open` button.
15. Once the file is selected, click OK to close the dialog. The file will appear in the configuration modal window.
16. Select `OK` to close this window. You will return to the Group Policy editor. This window can be closed.
17. Locate the branch of the organization, inside the domain controller, where the devices on which you want to install FlexxAgent are located. Select the branch and right-click it. `Select Link an Existing GPO`.
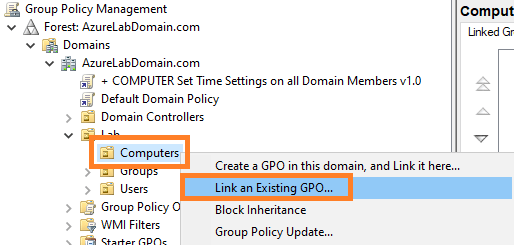 18. A selection dialog will appear where you will select the policy created earlier. Once selected, click OK.
## Verification
To validate the installation of FlexxAgent on a domain computer, you need to restart at least one of the devices within it, so that the Group Policy takes effect.
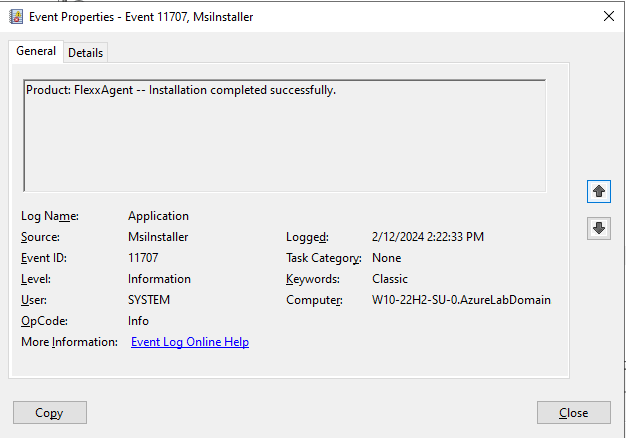
After the restart, access the Event Viewer, in the Application log section, where you can review the events generated during the installation and the first run of FlexxAgent.
18. A selection dialog will appear where you will select the policy created earlier. Once selected, click OK.
## Verification
To validate the installation of FlexxAgent on a domain computer, you need to restart at least one of the devices within it, so that the Group Policy takes effect.
After the restart, access the Event Viewer, in the Application log section, where you can review the events generated during the installation and the first run of FlexxAgent.
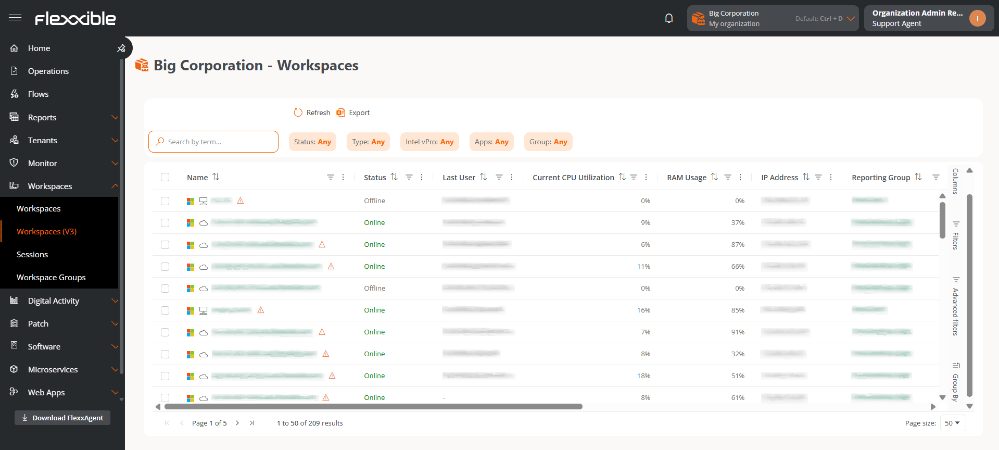
 After a few minutes, you will see the new device registered in the Workspaces module and in the `Workspaces` view in the Portal.
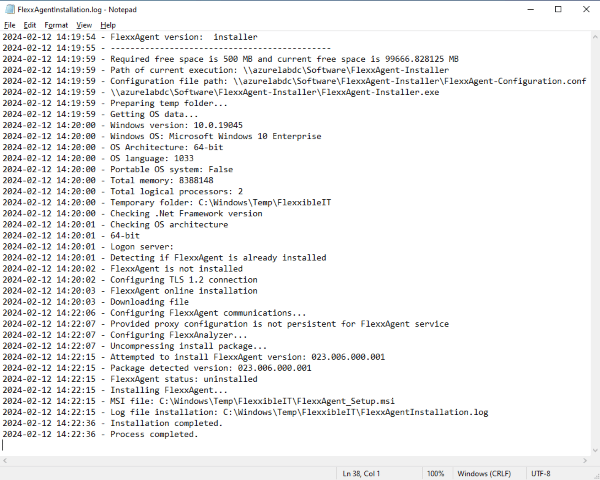
 The installation log can be viewed in detail in the file `C:\Windows\Temp\FlexxAgentInstallation.log`.