> ## Documentation Index
> Fetch the complete documentation index at: https://docs.flexxible.com/llms.txt
> Use this file to discover all available pages before exploring further.
# Microsoft Entra ID
This section lets you configure integrations with Microsoft Entra ID for different tenants. A single organization can have several active integrations, which makes it easier to centralize information and manage resources coming from different Entra ID environments.
In addition, these integrations simplify device administration, let you view consolidated information, and run various actions on the managed resources.
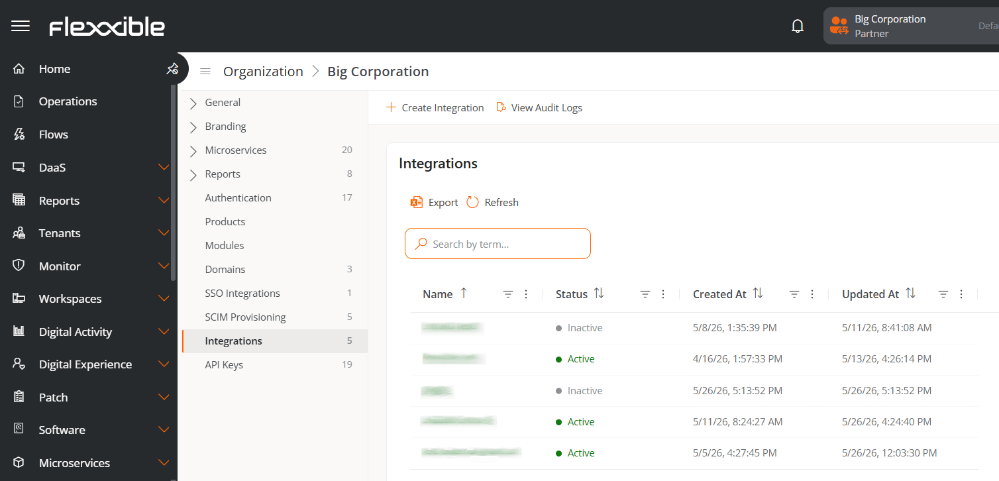 ### Table information
The table shows the following information:
* **Name.** Name assigned to the integration.
* **Status.** Current status of the integration: **Active** or **Inactive**.
* **Created on.** Date and time of creation.
* **Updated on.** Date and time of the last modification.
### Create integration
To create a new integration:
### Table information
The table shows the following information:
* **Name.** Name assigned to the integration.
* **Status.** Current status of the integration: **Active** or **Inactive**.
* **Created on.** Date and time of creation.
* **Updated on.** Date and time of the last modification.
### Create integration
To create a new integration:
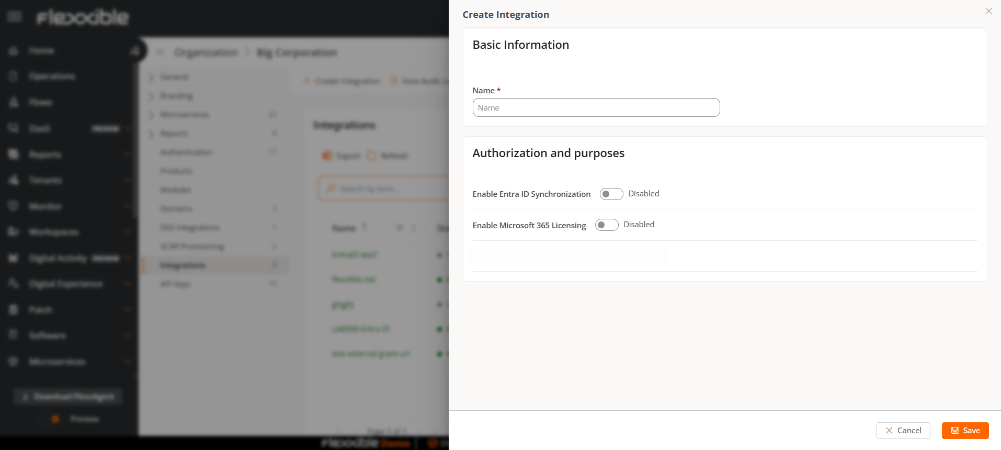 1. Click **Create integration**.
2. Complete the required fields.
**Basic information**
* **Name.** Identifying name of the integration.
**Authorization and purposes**
* **Enable Entra ID synchronization**
Lets you synchronize information from Microsoft Entra ID with the platform to create **Entra ID** workspace groups. These groups are kept synchronized automatically with Microsoft Entra ID and can be managed alongside the static and dynamic groups already existing in the organization.
1. Click **Create integration**.
2. Complete the required fields.
**Basic information**
* **Name.** Identifying name of the integration.
**Authorization and purposes**
* **Enable Entra ID synchronization**
Lets you synchronize information from Microsoft Entra ID with the platform to create **Entra ID** workspace groups. These groups are kept synchronized automatically with Microsoft Entra ID and can be managed alongside the static and dynamic groups already existing in the organization.
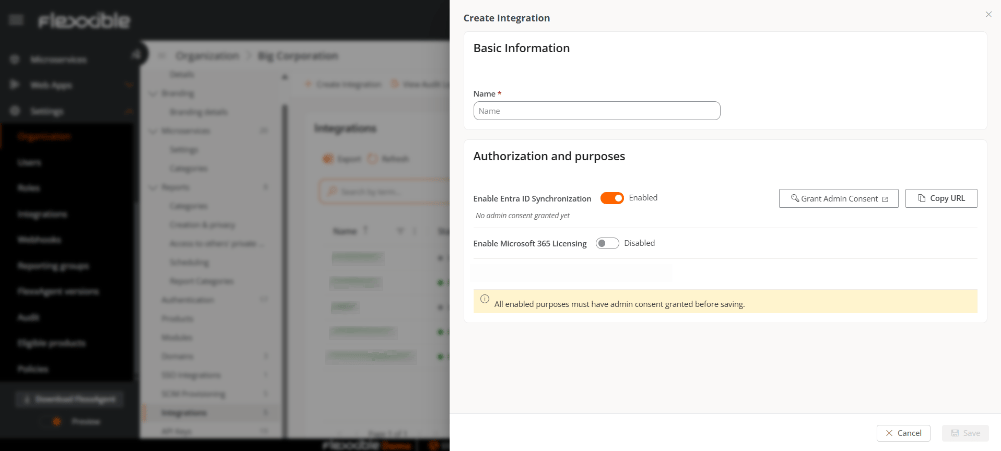 * **Enable Microsoft 365 licensing**
Lets you retrieve information related to the Microsoft 365 licenses assigned in the configured organization.
* **Enable Microsoft 365 licensing**
Lets you retrieve information related to the Microsoft 365 licenses assigned in the configured organization.
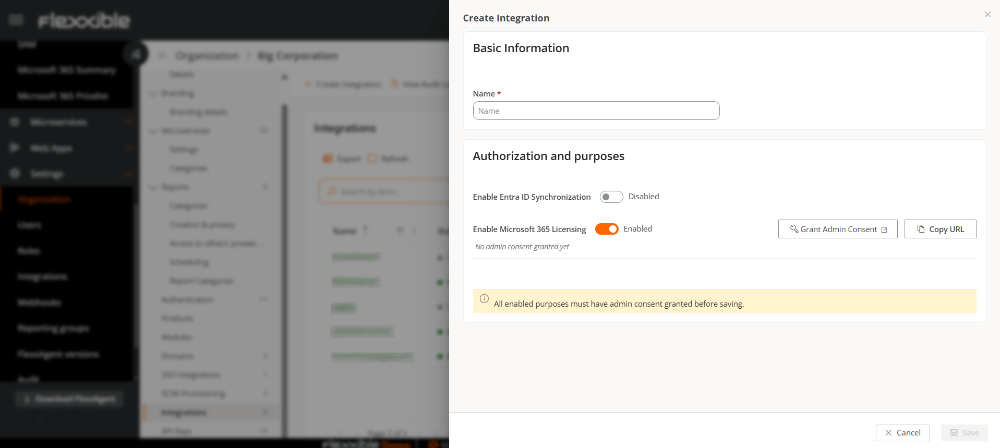 Enabling Microsoft 365 licensing is independent of Entra ID synchronization. Both options can be configured separately.
To complete authorization, there are two scenarios:
#### The user is an administrator of the Entra ID tenant
1. Click **Grant admin consent**.
2. Sign in with an account with administrator permissions in Microsoft Entra ID.
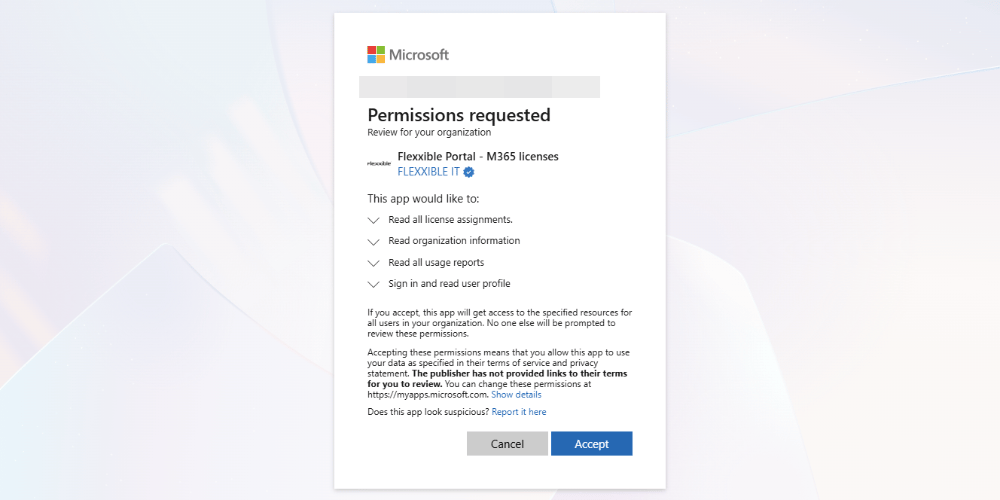
3. Review the permissions requested by Flexxible.
During the process, a consent window similar to the following will be shown:
Enabling Microsoft 365 licensing is independent of Entra ID synchronization. Both options can be configured separately.
To complete authorization, there are two scenarios:
#### The user is an administrator of the Entra ID tenant
1. Click **Grant admin consent**.
2. Sign in with an account with administrator permissions in Microsoft Entra ID.
3. Review the permissions requested by Flexxible.
During the process, a consent window similar to the following will be shown:
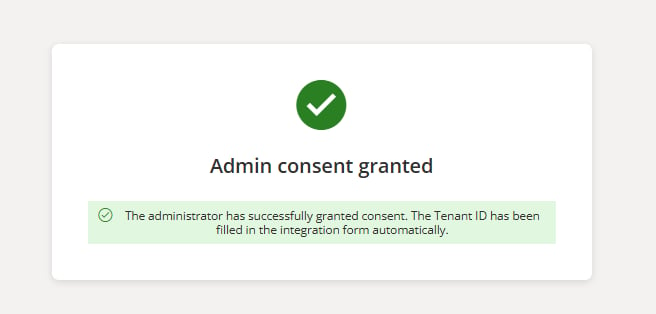
 4. Confirm the authorization.
 #### The user is not an administrator of the Entra ID tenant
1. Copy the generated consent URL.
2. Send the URL to an administrator.
3. The administrator must open the link and complete the authorization process.
#### The user is not an administrator of the Entra ID tenant
1. Copy the generated consent URL.
2. Send the URL to an administrator.
3. The administrator must open the link and complete the authorization process.
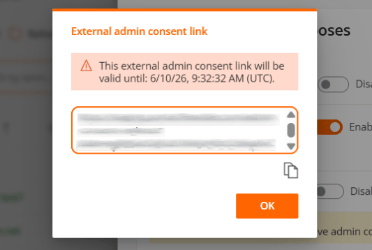 The consent link is valid for 24 hours.
Once authorization is complete, the integration will appear in the main table. When you open the details, you can view the date on which the permissions were granted.
### Considerations for Microsoft 365 licensing
* FlexxAgent does not need to be installed to configure this integration.
* The first synchronization is performed when the integration is enabled. Afterwards, license information is synchronized automatically once a week.
* When the integration is enabled, the [M365 summary](../apps/software/m365-summary) and [M365 pricing](../apps/software/m365-pricelist) sections will be shown in the **Software** section.
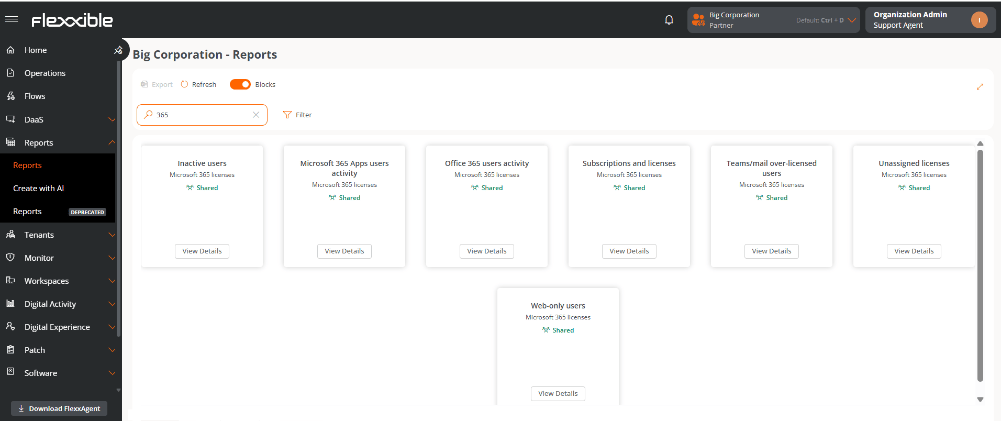
* The integration also automatically generates seven [**reports**](../reports/reports-categories) that provide information about the licenses and usage of Microsoft 365 tools by users:
* Inactive users
* Microsoft 365 Apps user activity
* Office 365 user activity
* Subscriptions and licenses
* Users with excess Teams/email licenses
* Unassigned licenses
* Web-only users
The consent link is valid for 24 hours.
Once authorization is complete, the integration will appear in the main table. When you open the details, you can view the date on which the permissions were granted.
### Considerations for Microsoft 365 licensing
* FlexxAgent does not need to be installed to configure this integration.
* The first synchronization is performed when the integration is enabled. Afterwards, license information is synchronized automatically once a week.
* When the integration is enabled, the [M365 summary](../apps/software/m365-summary) and [M365 pricing](../apps/software/m365-pricelist) sections will be shown in the **Software** section.
* The integration also automatically generates seven [**reports**](../reports/reports-categories) that provide information about the licenses and usage of Microsoft 365 tools by users:
* Inactive users
* Microsoft 365 Apps user activity
* Office 365 user activity
* Subscriptions and licenses
* Users with excess Teams/email licenses
* Unassigned licenses
* Web-only users
 * The synchronization processes performed once a week are recorded in the [Operations](../traceability/operations) section.
### Delete an integration
To delete an integration, follow these steps:
1. Go to **Settings** → **Organization**.
2. Select the **Integrations** tab.
3. In the table, click the integration you want to delete to open its details view.
4. Click **Delete**.
5. Confirm the operation.
* The synchronization processes performed once a week are recorded in the [Operations](../traceability/operations) section.
### Delete an integration
To delete an integration, follow these steps:
1. Go to **Settings** → **Organization**.
2. Select the **Integrations** tab.
3. In the table, click the integration you want to delete to open its details view.
4. Click **Delete**.
5. Confirm the operation.